Showing posts with label Prepareness. Show all posts

Wednesday, July 12, 2017

Experiment With Egyptian Onions

When a Colorado friend said that I needed Egyptian Onions. I didn't have a clue what she was talking about. But since her goals are essentially the same as mine, she had my interest. Especially since I've failed miserably a number of times trying to start onions from seeds. Oh I can grow the seeds really well and collect them just fine but all the plants that come up are super spindly. I don't know what I'm doing wrong but I've done it four times now. I figure if you are going to make a mistake at least you could make a different one each time so you can learn but  yet make progress. I'm still stuck at ground zero.  That is what made this onion that keeps going on its own sound almost too good to be true. When a friend of my husband, who adores my peanut butter cookies, said he had some and offered a few plants. I figured a trade was in order. His parting words of, "Be careful or they will take over the garden." left me a bit nervous but not detoured. Was this like Spearmint?
 
Rest assured they are not and I've decided I want more, and more, and more of these. They really are yummy! A bit strange since they clone themselves forming multiple onion sets on the top instead of seeds but strange can be good. When the sets are too heavy to hold up, the stalk bends over allowing the new plants to touch the soil and form roots. Thus one plant becomes many more and from this propagation method comes the name walking onion. The top set of tiny onion plants gives this plant the name Top Onion and for others they may know it as Winter Onion because it is good from zone 3, which is us, to those in zone 6 where you can pick this hardy onion all year. I've read that there are differing types of these onions but then not all relatives look alike so I'm not surprised. They do all have the strange propagation method.

 With so few plants, I did not cook with any of the onions until this year mainly due to confusion on the subject. I saw lots of recipes for pickling of the little onion sets on top and learned that you pick them when they are at least a half inch in size. But seriously people, I'm not growing these things for a few tiny little onions on top so I kept researching. Meanwhile, I removed the sets off of the tops of a couple plants like you would the flower bulbs that begin to form on traditional onions. 

As I suspected, the energy in the plant went to the bulbs instead of onion top sets. In fact, they gave up growing top sets of onions all together and the bulb increased in size. Now were talking something I can really use.

How big they will get I'm not sure. Like a kid with a pocket full of candy, I had to sample. Everyone on the Internet I listened to said the onion is a bit zesty. I did not taste that. Maybe it is because we live in zone 3 and heat has a tendency to make things hotter in flavor but these onions just tasted like... onion. Maybe a hair, and only a baby hair stronger but to this onion aholic, it was yum dilly ishush. I cut up a couple bulbs and cooked part of them with potatoes. There is nothing like fried potatoes and onions. They are soul mates.

Now I'm thinking why oh why did I not clip the tops of more of the onions while the sets were just beginning to form? I think I'll pretend it is so I'll have lots and lots of Egyptians Onions to do it to next year and you can bet I will. 


As for the rest of you, you can pick the top sets if you like to pickle but it takes a whole heaping lot to amount to anything, so for me, I'm going for the bottoms. If you are harvesting enough bottoms, you can be sure these onions are not going to take over the garden and how could you not. They are too yummy to let walk away.

While I was eating the bottoms, I tasted the top sets too. One has to compare and after all it is what everyone is talking about. Very mild in flavor like I suspicioned - similar to traditional onion stalks. For me that is what this onion is missing. Good tender stalks. The mature stalks are rather tough and woody. They say you can use these onions in the early spring like bunching onions and the stalks at that stage are tender but alas, I did not. Seems to be alot of that this year.  Maybe next year I'll feel I have enough to use these as spring onions. They should be ready just about the time my stored onions run out or the last few are getting soft. How perfect is that? Thank you dear friend. These are indeed a must have for my garden. 

Thursday, December 8, 2016

To Ghee Once Again

It has been a few years since I made ghee. Time is so constrained with so much to do. I am trying to figure out ways to save on our grocery bill and I do have lots of cream. I have made ghee each week from freshly made butter but now I can see the next batch will come from the freezer. I was wise and froze quite a bit. The goats are quickly drying up as the low temperatures drain their bodies. Calories are being spent on keeping warm, not producing milk especially since they are pregnant.

The plan is to have enough separated milk to keep buttermilk, and yogurt going. I usually use whole milk but not during this time of year. I will use separated milk and hopefully have enough to drink also since we don't drink much milk. I  put away some canned milk for cooking earlier this fall and hopefully that will help ease the need for frozen milk. The cream I froze will become sour cream of which I have not started culturing. It will probably have to wait until Christmas gifts are done. I also will make ghee and cook with cream. It will be interesting to see if I have frozen enough. What would have been better is if I had already made my ghee and canned it as I wish to eliminate one of the three chest freezers we have. I also want to play with making cultured butter. The butter I make now is not as flavorful as I like so I buy less expensive butter to cook with and Amish cultured butter to eat.

Someday I hope to be making all my own butter and ice cream but energy, time and enough cream is a problem.  Problem is winter is when I have the time to do the most things with our milk and it is at its lowest supply. I could make lots of butter and pack it away in the freezer. I could make lots of ghee and can it for the rest of the year in the winter IF there was more milk. 

 It is impossible to do everything all year long. Winter I could also try my hand at cheese and freeze some. Maybe dear little Ellie can fill that winter void. I hope to calve her in September of 2018 allowing her to raise her calf for five months. She would produce more milk than the calf needs so the extra would supply us with milk during the winter along with the plethora of things that it can be made into. I know how to make Feta and mozzarella, and want to start making Monterey Jack. The last being a cow's milk cheese. I would continue to milk the goats fall and into December and hopefully this would help create that freezer surplus along with milk from Ellie.

One of winters tasks this year will be trying to figure out when different tasks can be done and how to push others into a season when the tasks can more easily be done  because things are just a hair bit slower.We need a cellar I can see to help with the vegetable side of this.

Ghee lately has been substituted for most of the olive oil we once used. That is definitely saving us some money. Ghee is now what we fry with since it has a higher smoke point. It is what I use in bread making too. It is not the best in pie crusts and cookies - rather greasy. It would be good if it was except I would never be able to keep up making the stuff because unfortunately we love our sweets. We want to use ghee because it is even more nutritious than olive oil. We don't use it because it is cheap. It is only less expensive for us because the base (whole as in cream and all milk) is something we already have.
The children who dislike the smell of it cooking don't dislike the taste. Some of the children think it smells like buttered popcorn, others think it stinks.

What I learned is that ghee comes at a price. These two half pint jars that I figure is equal to a wide mouth pint jar is what is left after cream is separated from over two gallons of milk. I get about three quarts of heavy cream from 2 gallons of milk this time of year. This cream is then made into butter. The butter is then cooked down removing the dairy part. The dairy forms a clump on the top of the oil and sticks to the bottom of the saucepan.What remains is this pint of ghee. I saw one person feeds the butter cast off to her dog. I think I will start feeding it to our barn cats. An area I am working on saving money too is buying less cat food.

If you wonder why ghee is so expensive at the store. Over two gallons of milk down to just one pint is the reason. The health benefits make it worth the effort but I don't recommend that you go to the store and buy organic butter to make ghee from except as an experiment to learn how. I have been going through about a pint and a half a week - pricey indeed. But this is all a part of self-sufficiency. What I have not done yet is use this oil for light. Yes, that is possible. Ghee is indeed nutritious and versatile.


Thursday, November 10, 2016

What Makes Beef Tough?

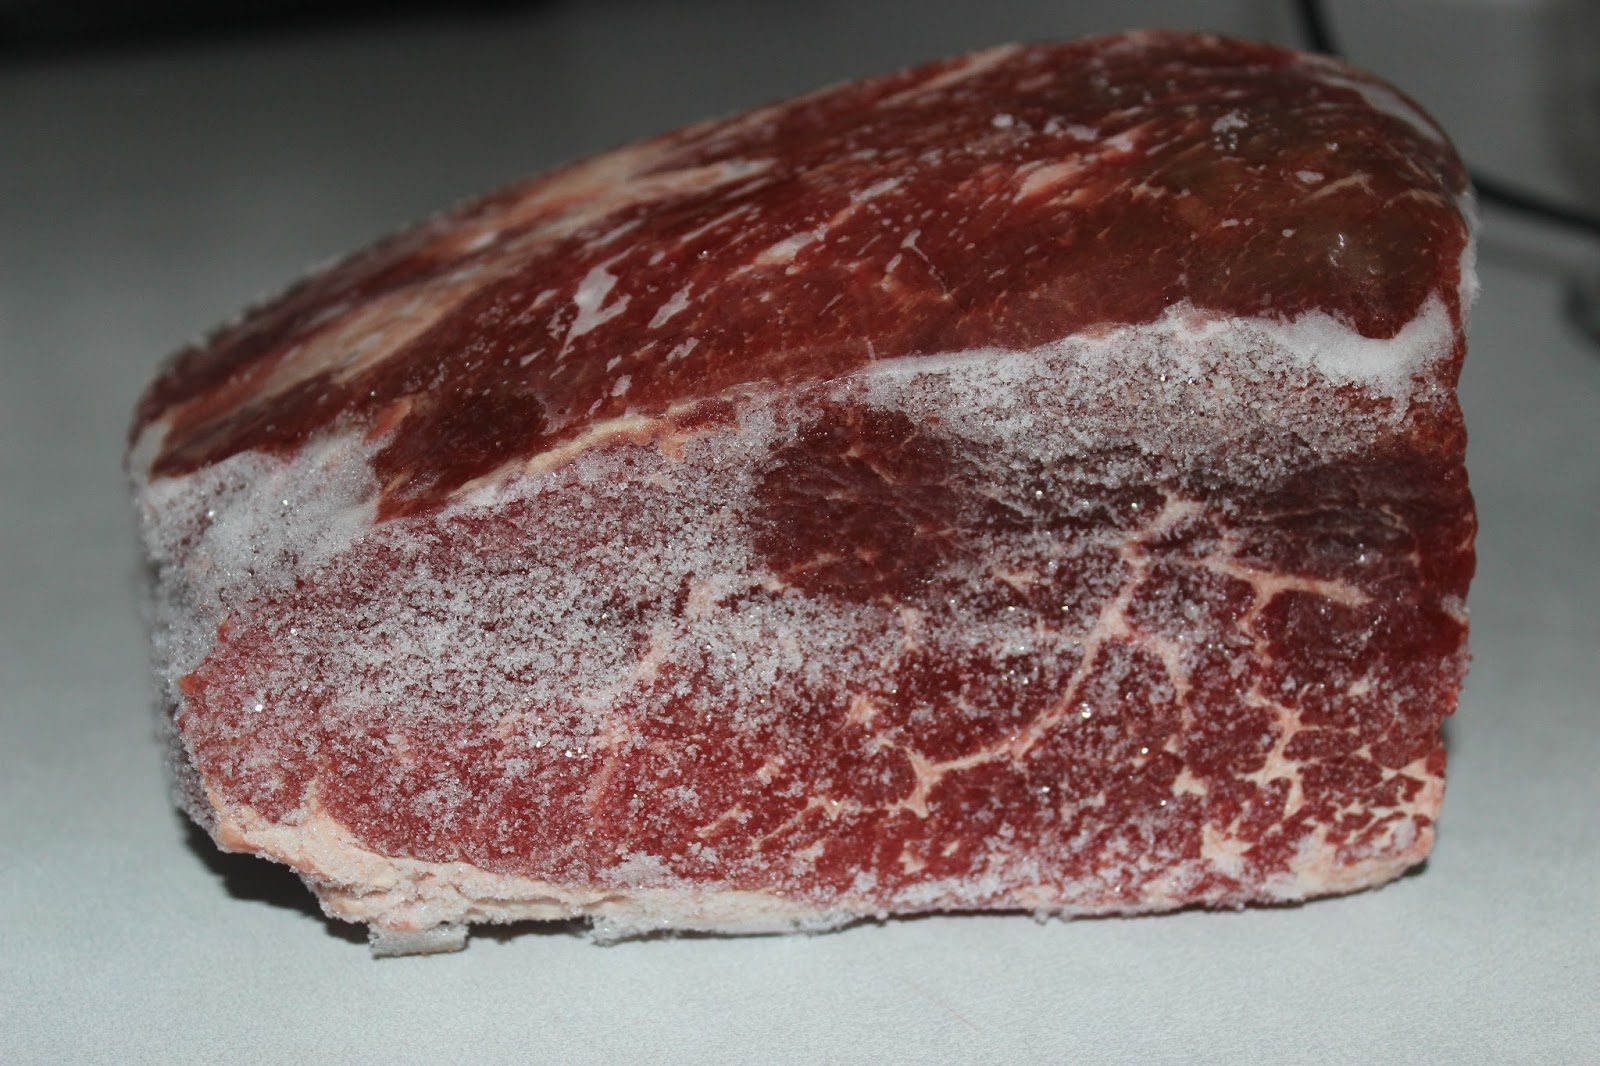
I have had to buy -- or should I say have chosen to buy some meat from the store lately. Roasts in particular as we are out and I refuse to buy lunch meat loaded with chemicals and a fake flavor. The scary thing is I bought some chuck steak to cook roast like for lunch meat and the stuff increased in size instead of shrunk -- scary! What are they putting in our meat these days? Since the fox cheated us out of some chicken, we have purchased a little of that also. We don't eat much store chicken anymore and interestingly our cholesterol levels are lower than they have been in many, many years. Makes me wonder what they put in them? Motivation to do our own crops up everywhere. Much easier when you are feeding 2 but with the grandkids here most of the week it is 6, making it a much more difficult task.


As I walk the isles on sale day, I notice the only roast in my budget are the tougher cuts. Good thing I like them and know how to cook them to a tender point. The cooking of tougher cuts of beef, pork, and lamb and wild game is the same. We have eaten lots of wild game, yak, and bison which all are cooked in the same manner.
I knew very little about meat and the various cuts until we began cutting our own. Before that I found the meat section of the store confusing. What cuts do you purchase to do what with? In this confusion you might have had a very chewy meat experience because the cut was cooked wrong. Yes, there is some meat that no matter what you do it will be tough but with this meat there can be a flavorful broth made. You just don't want to pay 6 dollars a pound and have something not chewable when you are done. My mom was a pro at cooking a roast to the tough leather stage. She cooked it at too high a temperature, without enough moisture and for too short a period of time. Of course it was a tougher cut of meat to start with.


https://www.angus.org/pub/beefchart.pdf is a great site to see just where different cuts of meat come from. What we learned when we started cutting up our own beef was that you could get different cuts from the same section of beef. Customizing is a great lure of do it yourselfers. For instance, pork chops is the cut from which Canadian Bacon also comes from. Either you cut a little of the section for chops and make Canadian Bacon from the rest or you choose between the two. 


If you look at a beef, the top center of the beef and top of the hip is where the choice cuts come from, the loin, rib, sirloin etc., most of your steak cuts. Prices reflect this. The bottom section is where the animal gains its locomotion, hence, locomotion muscles. This is the hip and shoulder where the legs propel the animal forward. The top of the shoulder is where my favorite tougher cut comes from, Chuck. Chuck has the most awesome flavor. It is my absolute favorite beef meat and I will take it over T-bone steak any day.


There are other factors besides locomotive versus support muscles (the muscles that aren't locomotive muscles) that determine the tenderness of beef. They are Marbling, Stress, Feed, Aging, Slicing Across the Grain, Marinating, and Proper Cooking.
Marbling may be something you avoid because of fears of cholesterol. It is marbling though that gives meat a perceived tenderness because fat acts as a lubrication when chewing and aids in the separation of fibers. Fat lubricates between meat fibers making the fibers easier to pull apart giving those molars an easier time. Fat also stimulates the production of saliva which further stimulates taste. Fat also helps protect against over cooking. Don't avoid fat, just be smart about it and don't over eat.


Stress tightens the muscles and produces tough meat. Most animals travel a long distance to the butcher and if they are not left long enough in pens in order to relax some, then you taste the results. Our livestock die where they lived so they have no travel stress or stress from being corralled in a strange environment. They are placidly eating grain and then dead. It is that quick.


Feed plays a part in that corn fed beef is usually more tender because it increases fat levels and the animal gains weight quicker so it is butchered at a younger age. Younger animals are more tender. Our animals are closer to 2 years of age instead of 18 months. Pasture fed along with hay and a small amount of wheat is what ours eat. The increase in age gives us more natural flavor and because of the relaxed environment, taste testers have all chorused saying the meat is tender. My cousin and her husband came and had steaks with us but complained about how large they were thinking they could never eat it all. To their surprise they devoured it. They buy a half a corn fed beef every year but had not tasted anything quite as good as our beef. Feed choices equates to different flavors and different people like different flavors. In lamb this is especially true as it feed makes a large difference in flavor.


Our favorite beef is Coriante but they are not fun to keep in as they are wonderers by trait and they are much slower growing. This means lots more feed to meat ratio and time, lots more time to get to butcher size. Unless you have mild year round weather so little hay is need plus lots of pasture, it just isn't real cost effective. We bought a good sized Corianted to begin with and may do that again one day because I'm craving it. We eat mostly Angus since it is readily available. That is what will go into the freezer this year and a Angus /Semental calf that will grow and do the same.
 

Aging, marinating, proper cooking, and slicing across the grain, all help to tenderize meat. There are two kinds of aging, wet and dry. We do only dry and our meat does not hang as long as traditional corn fed beef. Diet plays a role here as does time in order to be able to process the beef. We have to coincide our hanging time with days off in order to get the job done - not necessarily when it is best for the meat. Yet we have been blessed with very tender beef. Dry aging does not work well on pork, lamb, and veal as they do not have the marbling to protect the meat from rotting. Corn fed beef can be aged longer because of the increased fat levels. I have to say our pasture, hay fed are not any less fat but they are babied. Most of you don't process your own meat so I won't go into aging. Marinating and cooking I will talk about in another post.


That leaves slicing across grain. That makes a huge difference as it cuts up the connective tissues in the meat. Fibers in the meat run in a direction. You cut in the opposite direction that the fibers run in order to break up the connective tissue. We cube a lot of our meat, almost all of our wild meat. We have a cuber that has knives that cut through the meat tenderizing it. Unlike the butcher or store meat that runs the meat through once. We run ours through from top to bottom and flip it so it runs through side to side so it gets really tenderized. Great if you have sever TMJ like I do. I have no trouble with mine but the dentist cringes when he works on my teeth.

Thursday, April 7, 2016

My Tomato Plant Experiment Just Became Bigger


I went to see our oldest daughter. Unbeknownst, I seem to have included her into one of my experiments. One of my tomatoes grown from seed needed a home. Our oldest grows a few vegetables in pots wherever she happens to be renting. This time she has a lovely enclosed back porch that has two big windows flooding the place with warm sunlight. Her lemon tree is there and I figured it needed a companion.
That tomato plant has grown like crazy. I swear the thing has doubled in size in one week and not just up but out. She thinks she can actually tell a difference each day. It is gorgeous. I was feeling rather guilty as none of mine look that good or big. Then reality set in. There is no way I have room for pots that large let alone eleven of them for just the tomatoes. A closer inspection of the lush plant revealed that it had only three blossom clusters in the earliest stage of development. Is all the energy going toward the plant and not fruit? When I gave it to her it was one of the smaller tomato plants. Question - will the larger, healthier plant of our daughter's produce more fruit in its lifetime compared to my own smaller plants? Even if it does, I do not have room for such a large pot let alone eleven such pots. I have a few round pots and I think I will try and use a few on the porch but round does not fit in as small a space as square or oblong. With trying to grow plants in the house to eat and a number of plants started for the outdoor garden space is a big problem. It is why I do not recycle pots such as cottage cheese containers and vegetable cans.


With her inspiration I took three tomato plants started from seed in a big pot and set it in front of the side window by the front door.  I put them wa....y down in the pot to bury more of the stem so as to grow more roots and give the plant more support. The tomato plants from seed get tall and bend over especially when loaded with fruit. To only allow it to grow more roots but give them more support. The plants are suppose to get only 12 inches tall but mine from seed are more like 20 inches or they were last year. Right now we are at 15 inches.


The plant on the left is smaller I  allowed the blossoms to develop earlier than the plant on the right. At this stage the plant on the left has more tomatoes. Will the one on the left end up producing more tomatoes or the larger plant on the right? I definitely won't have a problem with the plant on the left breaking because it is too tall. Right now it has over 40 blossoms or tomatoes on it. Some on the window side are turning red. Not bad when you think I started this plant the beginning of January. Definitely faster than tomato plants grown and set outdoors. The cloned tomatoes having a few more blossom clusters per plant than the tomatoes started from seed.

 
So really I have three experiments going now. Cloned versus started from seed, allowing blossoms to form earlier or later, and small pots versus large. I may end up deciding that a combination is best . That way the develop of tomatoes will be extended over a longer period of time.
 
Part of this experiment is how many tomato plants it will take to keep us supplied with tomatoes. Not sure it can be accomplished as how can one get enough of summertime fresh flavored tomatoes? 

 This is this years experiment but next year it might be too cold a winter to grow the tomatoes in the window and they will have to go under grow lights. Then I will switch to cold hardy lettuces in the pots in the windows. I started removing more BIG rocks from the front flower bed. It was truly a ROCK garden. Not much room for much else to grow. In will go a long box to transform into a cold frame. It was a box a heavy piece of equipment came in. I'm always looking around to recycle. One of those recycle projects is bent T-posts that will be changed and used in the garden. Another one is using feed sacks to make tarps for the garden. Things are truly a hopping.


Thursday, January 14, 2016

Growing Peas, Carrots, Lettuce and Garlic Indoors

    (Tomatoes growing in the sunroom. The flavor is divine. We may never be able to eat tomatoes from the store again.) 
Wednesday when I went to the grocery store. I became VERY motivated about growing our own food. Cottage cheese was over 5 dollars a container along with a significant price hike in all other dairy products. Unfortunately it did not stop there and one of the shockers was cereal up over 5 dollars a box. Boxes that keep getting smaller along with bags of chips.

This fall I tried bringing in more money with sewing and lets just say it ended in disaster and my Addison's Disease in full blown anger from the stress and lack of sleep. The slap in the face turned me in a new direction. Why was I trying to make more money when I will never keep up with inflation. Kirk's work income has not. The answer has to be to watch our spending more carefully and make more of our needs ourselves. 
(Garlic is peeking up their heads.)
The area in which this would make the largest difference is in food production 12 months of the year. 12 months of the year though in Wyoming with a zone 3 growing season is not going to be easy. Yes, I know what the map says, zone 4, but they have got to be kidding. If you look at just the area around us you can see a big enough difference in temperatures, elevation, and growing season length that you can quickly see you need to figure out your own growing zone. 

I am presently studying winter gardening. Something I am told was common in our great grandparents day. Most of my books are from  milder climates but they still have good information in which we can adapt to our situation. I admit when they talk about it being tough in zone 5 or 6, I laugh out loud. With books in hand and searches through the internet I have been scouring the seed catalogues and thinking on how we can economically put in cold frames and greenhouses. The actual building won't begin until summer because right now we have a calf shed to tin.

 What I'm doing right now is planning. I'm looking at cold hardy varieties of crops. There are very, very few. Not surprising if you think about it. How many people do you know that garden in the winter? Demand equates to supply and no demand equates to extinction.
(We are picking fresh lettuce right before we eat, YUM!! Who knows how many vitamins are left in the lettuce you buy at the store after it has taken the long journey to your table?)

I am looking at locations in the yard where we might push a zone 4 or 5 growing area like the front flower bed which is on the south side and protected on the north by the garage and west side by the house. The south side of the house under the kitchen window might be a second place. We grew tomatoes and peppers this summer in the kitchen spot and found the season was extended for them by the protected, south location and heat that radiated off the house.
(Carrots, I think I planted them a bit thick. The seed was older and I questioned how well they would sprout. Oh well, I can thin them.)
I am trying new seed varieties in the house and with the night temperatures in the fifties in the sun room, I am getting an idea just how fast they sprout along with having a taste test. We have decided that we like Arugula with its peppery taste. I have three lettuces going right now. One I grew last year, Tom Thumb Lettuce, and a couple new varieties. Cardinale I am not impressed with so I will use up the seed and not reorder but Cimaron is doing very well and with Tom Thumb will go into the winter cold frames next winter for the second leg of trials. They are suppose to be cold hardy. I have others I am going to try first in the house to see their growth habits, texture, and flavor; how close together I can plant them and how quickly they grow.
(These peas are to grow between 6 and 8 inches tall with leaves that are great in salads along with the peas themselves.)
This first stage of experiments will give us a small bit of immediate relief nutritionally and economically. Plus it will test the limits of what I can grow and how much I can grow in the sunroom. This still leaves quite a bit up to outdoor gardening.

It isn't just lettuce that the sunroom is growing but Tom Thumb peas are sprouting, the garlic has peeked its head up, the spinach is showing its first leaves, and the carrots are up. More of the herbs has poked their heads through the soil and I have a few more to start. I am for sure going to start a cucumber but which one is not yet decided. I also am thinking about a zucchini and an eggplant just for the sunroom, not ones for the cold frames. 

I am having so.... much fun with my indoor garden. I think the satisfaction and joy is much greater with the contrast of snow covering the ground outside. It is a reminder of just how bland the vegetables from the store are. My husband emits a loud, MMMM!!!! when he bites into the cherry tomatoes with their burst of summer. I don't think we will ever be able to go back to bland.

It is not easy to find miniature varieties that are cold hardy. The second concern is how to coordinate the growing of crops for us to eat and the starting of vegetables in the house for planting the first week of June. It could get rather crowded and complicated with a few years needed to work out the problems.

Will all of this come to fruition? The motivation is sure there for each bite pushes us forward. Some things may have to be postponed to a more distant future. Isn't that the way of things? Some other more pressing matters will raise their heads but as long as we keep moving forward, though at times at a snails pace, we are still moving forward none the less and year by year we are becoming a little more self-sufficient.

Stay tuned for an update on the tomato project. The pictures will tell it all amazing difference. Plus I grew my first wheat grass for the rabbits and with the knowledge I'm tweaking my second batch to hopefully perform even better. The stackable cages came and the rabbits are indoors in the chicken coop. You just have to see.


Sunday, October 25, 2015

Potatoes and Other Things


This has nothing to do with today's subject but let me introduce you to our newest member of the menagerie, his name is Duke. With Kirk setting traps, our older cat spending long hours hunting, they just could not keep up with the influx of mice so Duke entered the scene. He is already catching mice at his tiny size. One day I watched him kill a mouse in the morning and another in the evening. Don't know how many he scores a day but it is impressive for so small a kitten. My advice would be if you want a cat to cuddle, go to the shelter; if you want a mouser, find a barn cat's kittens. They have the instincts to hunt or their parents would not have survived. Our cats of course have a back up of cat food to keep them healthy but I would not choose a shelter kitten for a barn cat job. They have the wrong resume. Duke is beyond spoiled as the grandkids seldom let his feet touch the ground. Good thing the three oldest are in school most of the day and there is just our three-year-old grand daughter left at home or the kitten would not get any work done.
***************************

Gardens are coming to a close here up north and ours for the most part came to a halt back on August 22 when we had a killing frost. Yes, even a bit early for here. I thought with all that I had learned the past 33 years gardening in our old home, same altitude, same growing zone, that the learning curve would mainly just be the change in soil. Boy was I ever wrong. Things that I could grow before like Brussel Sprouts just don't stand a chance up here. I even tried two different varieties. My first thought was they are a cool weather crop and hence should do pretty well up here? I've tried for two summers and they don't even come close to developing. Corn is another huge struggle and I have not gotten a crop in two years. I've not given up on it. I do love my corn and I have a few ideas to try. What I have learned from observation of the last couple summers is that we have far cooler nights and that halts growing until the temp raises in the morning. That means not only short season but cool season crops, really cool weather crops have to be found.

My sister has a kind of bean I am unfamiliar with that did well for her and she lives at a even higher altitude but I think their nights are warmer. She promised to send me some and said if I like them she will send more for seed. Like the taste I'm thinking is less important than if they will grow in a survival situation.  My dried bean experiments that has been going on for 6 years is taking a very different turn but I'll talk more about that later.

Short season, really cool weather crops will take priority and cold frames, tires, and row covers are going to have to be a big part of our plan. The greenhouse frame will have to go up next summer and since the tomatoes and peppers did well up against the house on the south side, we will work on a frame that can cover that area also. Anything that tempers the cool weather and holds warmth is going to be a biggy.
                                ******************************************
Since it is the time many will be digging their potatoes I thought I would update you on my experiments. I would not have my tators so early in September with the unusually warm weather we have had after the killing frost but when I dug up a few hills for eating, I discovered some rotten were rotten. I was shocked! My potatoes don't even rot when I hit them with a shovel while digging. They just scab over and remain firm. I'm blaming the ghostly pale, BIG fat worm lurking amongst my crop. Anyone know who it might be? He looked like a pretty shady character and I didn't like the look of him. The bites out of the potatoes were pretty good sized and I wasn't about to take a chance loosing the whole crop, so I dug.

At the encouragement of my sister, the same one with the beans, I tried Pontiacs since I LOVE red potatoes but they failed. I put Dakota's back in and they gave me a puny crop. They did better last year but not a terribly impressive show. The King George potatoes came through as they have through disease, drought, hail, and every other adversity. They even produced potatoes on plants that did not blossom last year. I never knew that was even possible. I get some pretty big ones too with quite a few per hill. More than anything else I've grown.
                                               Photo is of a King George Potato
I was thinking when I stabbed a few Dakotas, "Now these are going to turn to mush and I will have to put them in the mulch pile. There are too many of them to have for supper." Hmmm......" What shall I do to not waste them?" Here is where the brain fart enters in. "What if I took all the damaged potatoes and made potato flour from them?"  You know this brain never rests.  I hurried, washed them, boil the potato pieces, cut them up into smaller pieces, dried them in the dehydrator, put them through the blender to chop them up even littler, and I will put them through the wheat grinder when I get it out to grind wheat. The guilt of wasting food is gone and I am feeling pretty smart. Something I savor whenever possible. Especially since I have been doing some carpentry work lately and that always leaves me feeling and looking pretty dumb.

I have decided to halt my potato diversity plan for now and move on to my next experiment in the form of figuring out how to work with true potato seeds. Something the plants don't produce every year. Some of you don't even know what that is probably. I sure wondered what the clusters of green balls that produce where the blossoms were? That is them, true potato seeds. Potatoes that I had saved, put in the ground, saved some from that crop, and put in again produced the potato seeds. Not sure if that was what it takes or if the weather was just right but I plan to find out by keeping records. I've been wanting true potato seeds to begin my next experiments because of the  "What ifs?", which send surges of panic through me. "What if we were in a survival situation and my potato cropped failed? What would we put in the ground the next year to get a crop?" It isn't like you can keep tiny potatoes in storage for years. There were thousands who starved to death in Ireland from a potato famine. It could happen again as history repeats itself.

Don't know how long true potato seeds last but surely longer than small potatoes. I can see I have more research to do but now I can begin to learn for I have some seeds to grow into plants and begin the next phase of experimentation.

It is my understanding from research that it is the true potato seeds which harbor the genetic crosses that become new strains of potatoes. I'm not at the moment interested in producing a new kind of potato as I only have one kind that is doing well but I am hoping that the seeds remain viable for a few years giving me a back up safety system. First I have to plant them and see how long it takes to produce plants large enough to put in the garden. Well actually first I had to try to remove the seeds from the green firm balls. I'm hoping unlike peppers and cucumbers that there isn't a specific age development at which you have to do this. I just picked a few off of plants that were dying and a few more off the ground where they had fallen.

I followed directions that recommended you put the balls in the blender with water and chop them up. This left me with a mess, too much pulp per tiny seeds. Wondering how to separate this mess I put them in canning jars and waited to see which seeds floated, they are the bad ones, and which seeds fell to the bottom. The seeds just didn't want to fall because they were held up by all the pulp. I shook the jars now and then and tried skimming off pulp from the top. There were just too many seeds that ended up coming with each scoop and I felt wasteful. There has got to be a better way. If you know of it please share. I dried the seeds and pulp that I wasn't able to separate both ended up on parchment paper together and I figured the pulp will just rot away when I plant the seeds. That is plant them next spring under grow lights. Answers just don't come quickly when it involves gardening. It takes years to sometimes to find the answers and gain the skills needed.  It is one area I would gladly pay to be an apprentice to speed up the process. There are just so few that have the knowledge in my area
.
 Have any of you tried working with true potato seeds?


Friday, September 13, 2013

Corn Silk Tea

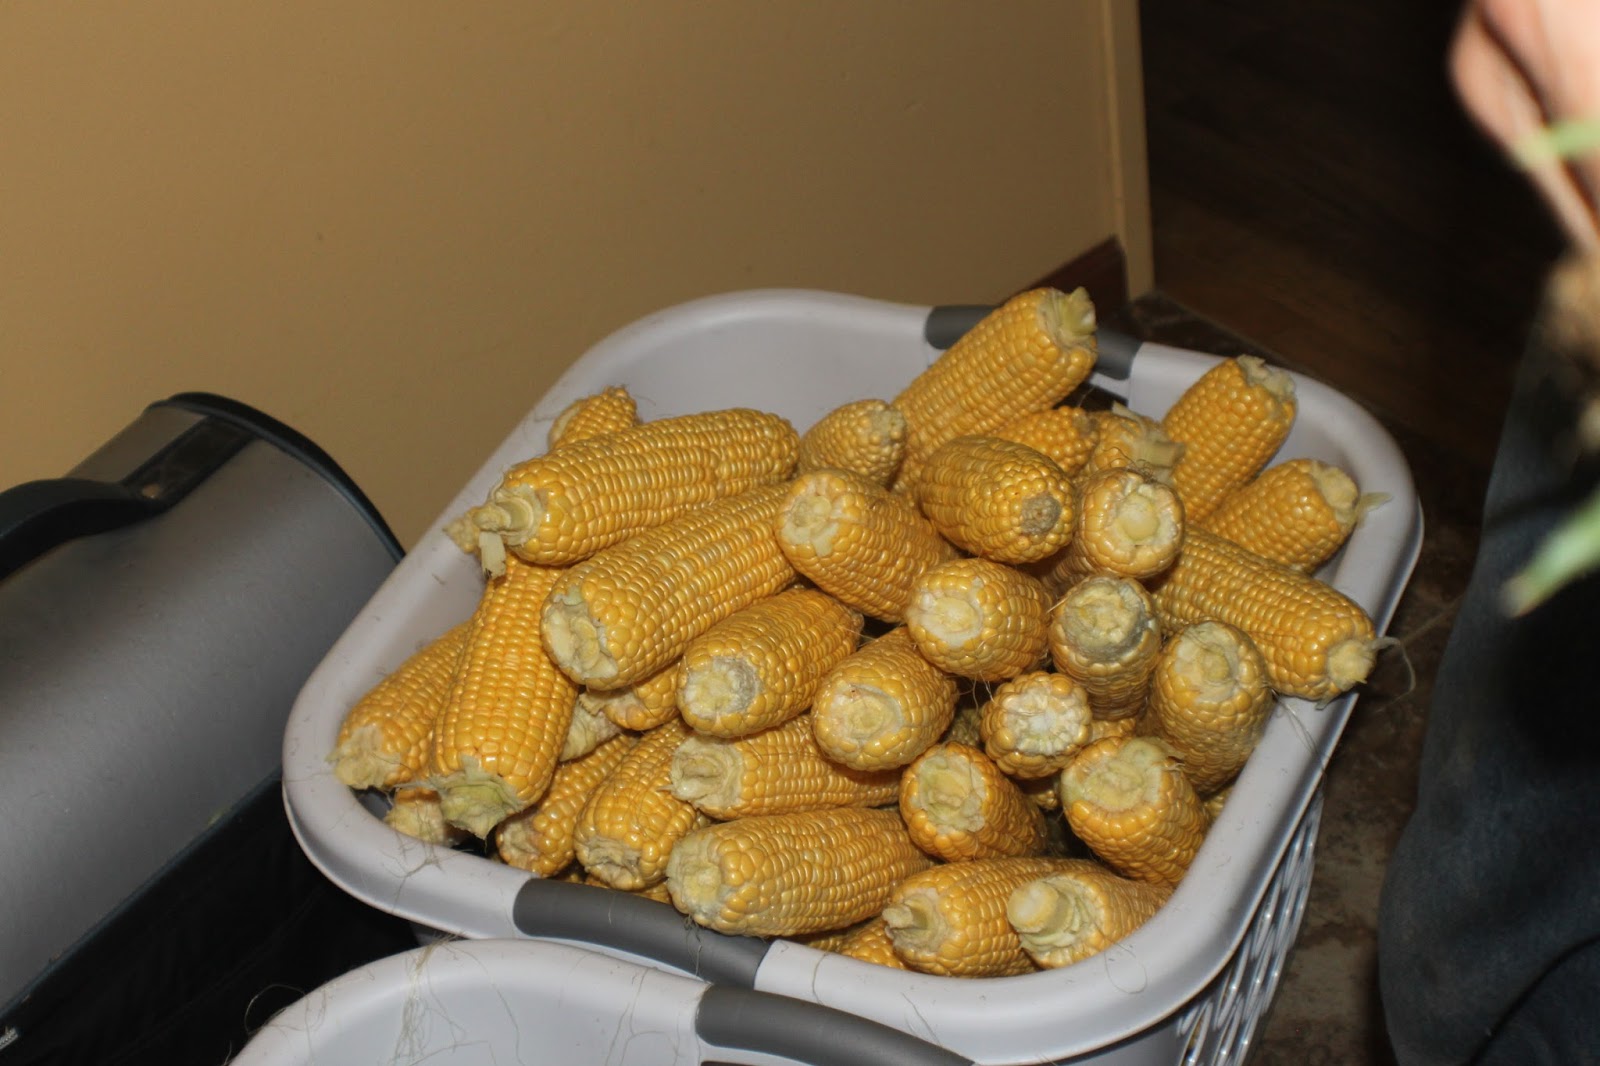
 Last week our oldest daughter showed up with the equivalent of six and a half of these square sized laundry baskets of corn on the cob. When she said she knew of a place where she could get free corn and did I want some, I said of course YES! I asked for six to ten dozen. She brought home more corn than I have ever done at one time in my entire life BY FAR.  Whoa did we ever freeze corn.  I was tucking it in every corner I could of freezer space until she took her cooler of corn home.

Explanation for such a load of corn, it was free and beyond that they picked until they felt inspired to stop. They'd come back to her vehicle and feel pressed to go out again so off they went until one time they felt they should stop. Probably in part because they ran out of room. LOL How could I argue with that explanation? I too have often felt prompted to do things I just didn't understand  at the time like can lots of peaches and pears though we only needed a few more jars. The reasoning is usually apparent the next year because the crop fails or money is tight. So I rolled up my sleeves, wondered what the reasons were without thinking too hard, and went to work.
 Luckily I had help, my daughter and some of the time my hubby. It meant we only had to stay up until two in the morning to finish. Finish the corn that is because we were too sleepy to finish the clean up. I cut the corn off the cob and then blanch it making the task far easier but it still seemed like the mound disappeared slowly. Then when we were about done I asked everyone to start saving the corn silks. It slowed things down considerably as you had to firmly grasped the silks and pulled the greenery away instead of the usual whisk of a couple pulls and the whole husk came off. Well, with me that is as I've done this a few cazillion times before.   
 What in the world was I thinking? Well I just happened to come across an article about the medicinal properties of corn silk.

Corn silk is used for
bladder infections, inflammation of the urinary system, inflammation of the prostate, kidney stones, and bedwetting. It is also used to treat congestive heart failure, diabetes, high blood pressure, fatigue, and high cholesterol levels.


Not that I was looking for any of that. Though a quick read and it became clear that corn silks are a good thing and one more natural  diuretic. What I was looking tooling around on the Internet was a natural source of vitamin C. I found out that corn silks are indeed high in Vitamin C and also K.Why the interest? In WWII Vitamin C was badly needed and so in England they dried rose hips and fed them to their children. I'm interested in self-sufficiency and Vitamin C is a biggy to have.

I've not tried the rose hips yet, the home-made ones that is, but it is on the to do list. The one that keeps getting longer no matter how many things I do. I have tried the store version of rose hips. Some will remember my experiment with pine needle tea as a source of vitamin C. Definitely a survival version as the taste is just like it smells -- not appealing. Not horrible but just rather sappy like.

 Dandelions are very high in C's and are also a diuretic. But then so are strawberries and lots of things. And now I've found out about corn silk so I'm thinking that more than one source of C's is definitely better especially since you don't know what the weather will bring. This year for instance it wiped out our garden. The pumpkins and other squash tried to come back but a month is definitely not enough time to do so before the threat of frost.

The high Vitamin K in corn silk might just come in real handy too as it helps to clot blood. Wonder if it would work as a poultice too? Hmmm....

With corn silks you do have to watch the amount. Too much of a diuretic isn't good. Too much corn silk and you could lower your sugar levels too low. Too much and you become dehydrated or your blood pressure becomes too low. As with all supplements we have to use our heads about them and remember that moderation is the key word. We also have to be aware of their interaction with the medications we are already taking.  

They recommend:
Corn Silk Tea Recipe: 2 tsps dried cornsilk to one cup boiling water. Let stand 10 minutes, strain and drink. Use only one cup per day for a maximum of 10 days.

My silks are dry and ready when I am.
Yet what excited me most about this project is that I can use more fully my corn. I'm not sure this corn she purchased is organic, probably not so I didn't save a lot of silk. But none the less it is worth trying a little in a few ways just to have the knowledge. Then when I have my own garden again I can save in a bigger way. We will have sweet corn and corn meal corn and the stalks can be eaten by the livestock. The corn by us either fresh, frozen, or dried. I don't like bottled. The corn silks can be dried and kept for medicinal needs. The cobs can be dried and burned for fuel. Now that is really using your harvest.
As for taste of corn silk -- I'm not sure yet. The Internet said it tastes like green corn. What part are they referring to because I thought if it was green then the corn kernels haven't developed yet so what are you eating? We will find out though one of these first days as I'm going to give corn silk tea a try. Got to be better than Blue Spruce needle tea doesn't it?

The other way they recommended using the silks was to put them in soups as a thickener. Now that sounds very doable as long as green corn flavor isn't repulsive. Hmmmmm...... don't know.Maybe best to go light on the amount at first.  

All I do know is that we haven't slowed down enough to get my head around using it. We've hauled hay twice this week which is a six hour trip twice. Hubby worked on the car replacing brakes, serpentine belt etc. while I cleaned up the house. Then yesterday we gutted the bathroom. We discovered a water leak. Not that there wasn't a hole in the floor already from a previous leak. We just hadn't gotten to the remodeling yet. So we began to tear as this appeared to be something new. The water was pooling by the toilet. Nope, not the toilet. Yup, the shower faucet valve once again but by then half the wall was tore out.

Oh well, in for a penny, in for a pound so we just gutted all the walls and removed the furnishings. We still have the floor and ceiling to go but it is a great start. We wanted to finish the front porch that day but the roofers called at 8 and said can we come in an hour and a half to do your roof. With shingles flying off we thought it best to remain indoors throwing sheet rock out the window into a wheelbarrow.

With houses galore to roof in town and a long list of customers we thought we'd better get it done while we could. There are 27 construction companies in town trying to repair the damage from the hail storm. Our population is only 1200.
  
I had big plans to go dump the bathroom garbage at the town dump 45 miles away north and shop for sheet rock and paint for the front porch the next day. Alas, yesterday morning I found a very sick yak at chore time. I'd not been doing yak chores for the last few days as we divided and conquered the livestock tasks. I attended the critters in the upper corrals milking and taking care of chickens. I barely even glanced at the yaks in the distance though I did ask if they were alright because I noticed Gracie laying down more than usual. The vet chewed me a bit and told me never to do this again. He said needed to take the full responsibility and have others help when needed. He was right. I have the gift and skill and it isn't fair to the animals to put it on others. 

Gracie baffled me. She had conflicting symptoms and I wasn't sure what we were dealing with except she was really sick. The matter was made worse since I was watching the little youngins that day. The one year old was in tow and a sick yak with big horns is not a place to have a one year old, especially since this yak hates kids. I called a couple friends to confer with leaving the tyke in the truck in her car seat. I then called the vet and his assistant relayed my information while he performed surgery. Then we loaded Gracie up in the trailer while my one year old looked on, shouting encouragement. Okay, she didn't shout encouragement.
She screamed in protest at being left in the truck locked in her car seat but what was I to do with her --safety first.

After picking up the four year old grand daughter from preschool at eleven we waited for their mom to arrive and then whoosh, off I went driving the hour and a half to the vets.

Heard the saying," Took everything but the kitchen sink."? Well I did take everything including the bathroom sink as my pickup had the toilet and all piled in back. Quite a site I'm sure but a girl has to do what a girl has to do. The dump was north and I was headed south.

Life has really been challenging the past couple years and especially this last summer. Yet despite all the challenges coming our way lately, I still stop each day and count my blessings. One can't be depressed and feel blessed at the same time. A friend I've known for years, though not a very close friend, committed suicide this week. I wish she would of counted her blessings each day. I've always found that the blessings out number the problems.  But it does take effort as blessings don't jump out at you like problems. So yesterday when I was feeling overwhelmed, I counted just a few of mine.  

 1. I had the help of two skilled livestock friends to load Gracie. They are often not available.
2. The trailer and pickup made it to the vets and back without a mishap. No flat tires and the truck started. It still isn't working right despite two new parts. At least one or two to go.
3. Wednesday we got the roof done.
4. The bathroom leak was a pain but at least we were planning on gutting the bathroom anyway and we've started. 
5. Gracie didn't need an IV after all like the vet thought from our phone conversation. It wasn't the terrible disease he feared and a big ole shot is all that was needed.
6. Since it is dust pneumonia it probably won't spread. Yes, dust can irritate the lungs and pneumonia will set in. We are really, really dry here with poor Colorado below us drowning.
7. Gracie's nose wasn't running and her fever appeared to come down last night. She was more bright eyed.  
8. I had money to pay the vet bill. It was part of the money I made selling the little whether goats. Not how I wanted to spend it but I had it none the less. Since Kirk is racking up the medical bills this is a biggy.

As I count my blessings I can see indeed, the Lord is mindful of me just as he is of every sparrow that falls. Though I have challenges a plenty, I'm never left to face them alone. I just have to look for the blessings to know of his love for me.

Monday, February 18, 2013

Cattail Cordage


Cattail,
every part of the plant is useful. It is found in ponds and slow moving water. Water being the key ingredient and something we have very little of. Most of our standing water is man made reservoirs and ponds of a very small size. To give you an idea of just how little water we have, our wells on average are 300 feet or deeper. Irrigation, well, that is something other parts of the Wyoming have but we only dream of.

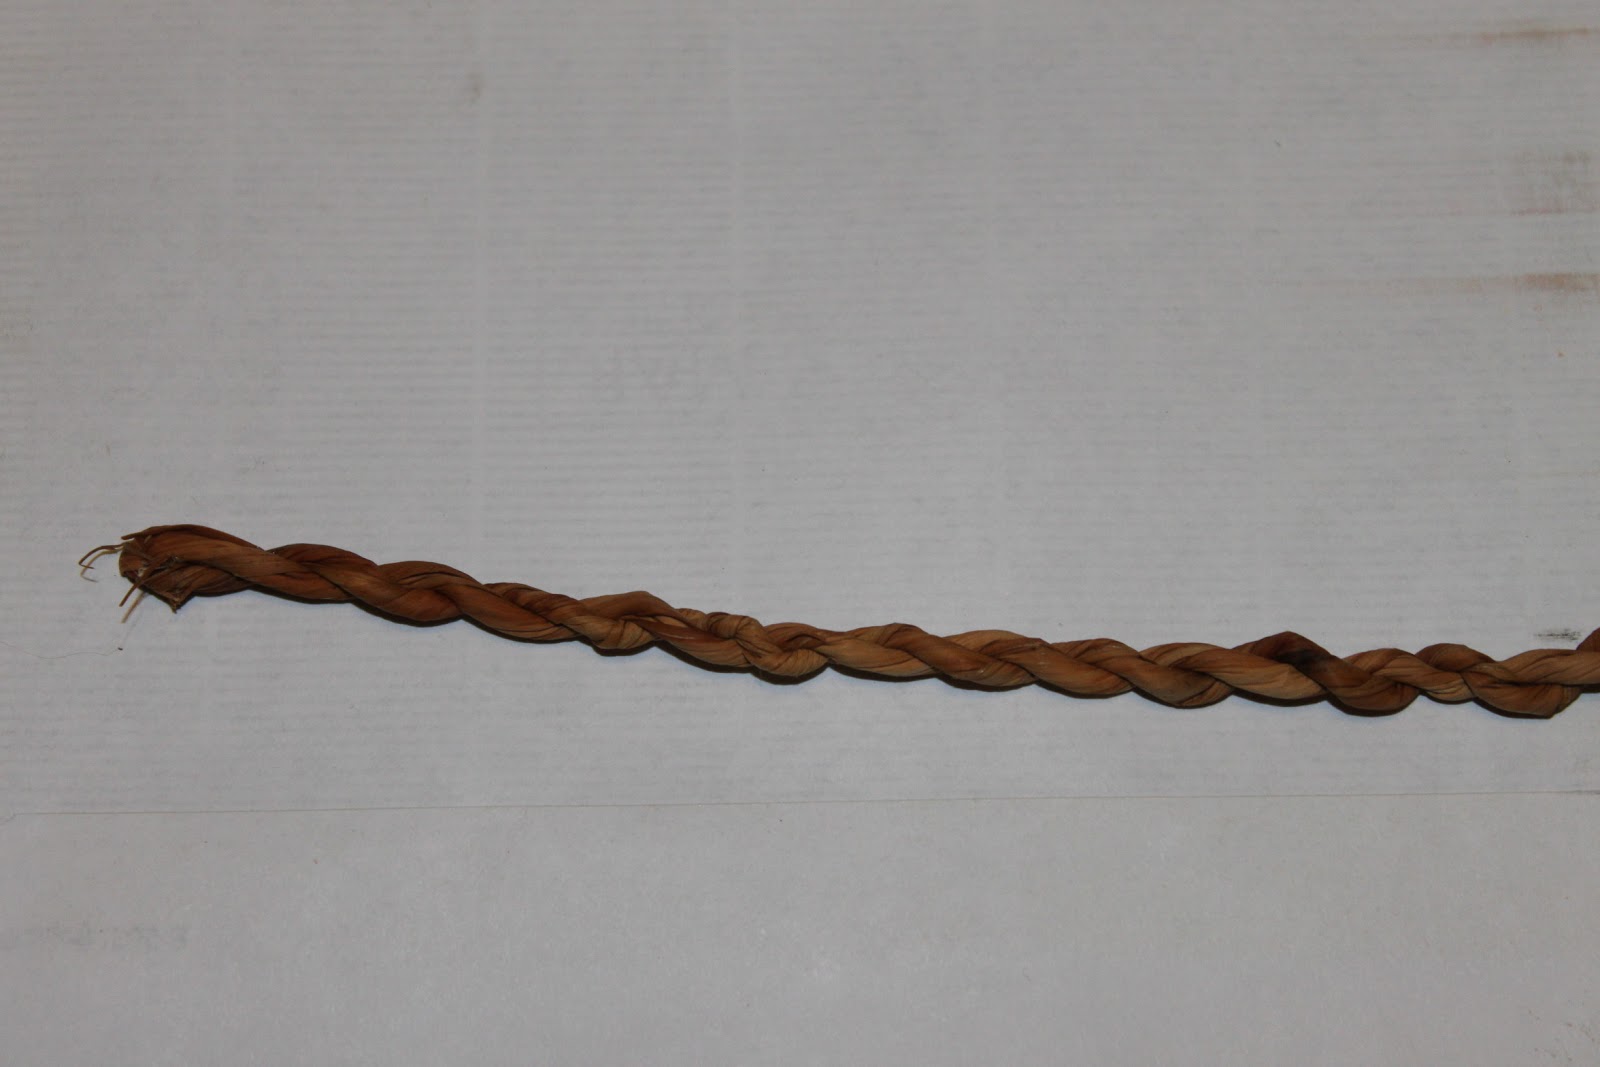
 Most of these watering holes are without cattails but we happen to have a man made pond on the edge of town with a few. Right now the roots are not accessible being frozen solid underneath a thick foot or more of ice. But come summer, we are definitely going to try eating the roots and repeat the experiment of making cordage. Oh wait a minute, I forgot to tell you, yes, the subject today is cordage from cattail leaves. 

Teaching Cub Scouts, my new don't have time to do but was talked in to pursuit, has led me to further explore knot tying. Of course my brain didn't stop there and I had to wonder what could we make cordage from in our area in a survival situation? Because face it, you can't do much of anything without rope. That is why survivalist replace shoelaces with parachute cord and tie parachute cord on to about everything in their survival gear.

I know squirrel moment here but have you seen those cool bracelets made of paracord with fishing line, weights, and hooks attached? Our son took it one step further and included a ferro rod as a latch. I've got to try that. And don't believe that drilling a hole through a ferro rod creates lots of sparks. My husband did so yesterday with no such excitement. This fishing gear, fire starter bracelet, would make a great addition to our Bug Out Bags. Toni has named hers Bob and she and I  are thinking about making a paracord belt for to add to ours. Not that we'd go around with them but we'd attach them to our bags and put them on when we bugged out.
 
But going even more basic than buying cordage is making your own. I've had a taste of this since I was a kid. My brother, use to buy basic hemp material and con me into helping him make pigin strings, since it was less expensive than buying the already made ones. A pigin string is a short thinner rope that you tie three legs of a calf down with to keep him under control and on the ground.
 
 My brother and I spent a fair amount of time doing just that as we were assigned to treat pink eye and other diseases that occasionally roamed through the large herd of cattle my dad managed. In a herd of five hundred calves they aren't all called Bobby and come when called, standing dossily while you give shots and probe in their eyes. Nope, if they have pink eye, they are half blinded and kick out at the slightest movement making dodge a survival sport. When medicating a calf without someone to hold them still, the pigin string became a handy tool. Since we did this from grade school on up, we also had to be held down in a fashion and treated for pink eye too, as hygiene is not a huge priority when you are young. Yes, I know pink eye intimately on several levels.
But cordage has more uses than this, just look around you, especially if you are on a farm, ranch, or homestead. If we didn't have a handy dandy hardware store available then what? We'd have to gather cordage material from the wild and prepare it and for most of us, that is something new. So far I've found cattail (the narrow leaf variety), yucca plant, milk weed, and I'm looking at different types of tree bark for cordage material in our area. Everything else I've found mentioned so far doesn't grow here and truthfully, yucca and milk weed are up north a couple hours so they don't either. I told you, we are on the BARREN plains.

As far as nettles, I'm still researching. Do we have them or not? Not here where Kirk and I live of course but up north again. I'm kind of hoping so because I'm hearing what a wonderful plant, weed, and  pest it is depending on your take on it. But to the herbalist it has cordage, medicinal, and food value.  
 
 Though some say dried out and grey is the color you look for in cordage material, I'm going with Ray Mears and other sites that state summer to be the best foraging time to pick and dry the material especially after making cordage from dried out winter starved cattail leaves. Then again maybe that doesn't hold true for all materials for another site said Milk Weed is best picked after the leaves fall. How is one to know? What works great in one area of the country may not hold true in another. Winter here means not a speck of green but in Kentucky there is lots of green in comparison, so I figure doing is the only true way of knowing.

Expecially since survialist avoid the open plains to do their shows. Seriously, Ray Mears came to Wyoming and showed walking across the grasslands followed by a horse and then did his show in the forrest. I'm not the only frustrated plains dweller for my husband follows Camping Survival on Facebook and they mentioned the same thing, calling for information on survival tactics on the plains. Frustration was the only response I saw.

I'm learning that preparing means not only reading and gathering but doing for especially on the plains there isn't much to guide us along the way. Hence, this summer we are going to try cattail roots and make cordage once more when the leaves are green and dried, to see what difference that makes. Then once more in the fall since we've already done winter. We will expand to Milk Weed and Yucca plants too when we can make the trip up north to gather them. We do hope to move to another area of Wyoming sometime to up our survival possibilities.
 
I'll admit I have a decided advantage to making cordage being a spinner because isn't spinning fibers into yarn simply making cordage? Softer yes, but none the less cord. I've use a broad spectrum of materials from a beef steers fluffy spring wooly cast offs to our Norwegian Forest cat's fur. Of course I've spun cotton, raimee, flax, mohair, quivet, a variety of wools ( Merino being my favorite) and even camel down and alpaca which send me into a state of bliss. Each requires minor adjustments in the way you handle them such as angora rabbit fur which I found wants to fly everywhere including up your nose but basically the method is the same no matter what material you use.
 
 So a cattail leaf is no different. It has a long fiber making that part easy but in its winter stage, it is very brittle despite a brief soaking in warm water. I did find ripping the leaf in half lengthwise to make the task simplier. Also pinching the leaf in half lenthwise gives it more supple. The narrower strands of braid I figure can then be further braided with other such strands to form a stronger rope. 


I'm not going into details on just how to braid cattails since there are scads of U-Tube videos on the subject. There just weren't many on how to splice in a new leaf to keep going but that too wasn't much different than what I do making yarn on the spinning wheel. Could I make this cattail cordage on the spinning wheel, not sure, I doubt it. I don't think it will at any stage have the suppleness required.
My biggest issue with this experiment was the breakage.
This is the whole cattail leaf made into cordage on the top and the bottom is the split cattail leaf. I see I should have twisted it a bit tighter. Remember that when you twist sharply away from you, the material unwinds a little to twist back on itself. There simply isn't a substitute for practice. The Cub Scouts and I did learn that this task is much easier to do with two people versus one.

There is another method of making cordage. I'd guess it would make the cordage last longer as you remove the cellulose from the plant which leaves strings. This I'm sure would lend itself to the spinning wheel. From what I can see and read, the method is basically the same as the process of turning flax into linen. This soaking, beating, and stripping is also on many U-tubes and will be what I'm wanting to try with Milk Weed and Yucca plants.

Tree bark cordage is also made in this fashion and we have a nice willow tree out back so this summer that is also on the list. Ray Mears on one of his shows makes a weak lye solution of hardwood ashes for soaking tree bark that was first lightly beaten. This would speed up the separation of the cellulose from the stringy inner material for he does this whole process in a few hours. Other instructors simply soak the materials until it smells rotten, which is a few days. If time constraits are part of the survival bargain, I can see one method being more helpful than the other. Which produces a better product, don't know.

Also does the renting process make a cordage that lasts much longer than simply using the whole leaf? I can't help but think yes, or why wouldn't they use the whole flax stem instead of renting it to make linen. This refining process I think would make a smoother and more flexible product also.

One critical need for cordage in a survival situation is for a bowdrill to start a fire. Our son has been using paracord for learning this technique. Would natural cordage make a difference? I know cattail cordage is not suitable for this but milk weed cordage is said to do well. And if we are thinking survivalist, then we have to think bow strings too. Hm.... my brain is a whirling now.

One of my problems in researching this subject is that most of the cordage information is from survivalist, not long term self-sufficiency-ists.  Okay, there isn't such a word but you get the gist. I'm looking into long term solutions. I can't help it, my brain goes there. I don't have a I've survived for 72-hours so someone has to bale me out now or I'll die attitude. I know this is the bag the government recomends and I agree people should have one because that is about as far as most people are willing to go without a hand out. But I'm not too confident in the government baling me out right now. It can't bale itself out. So I'm thinking more on the line of a survival bug out bag. or sticking tight and making do.

Now of course you can't talk about cordage and not mention rawhide and leather which lasts even longer than cordage made from plant fibers.  Besides, I love the look and smell of leather. And rawhide, well it is just classy. I admit, these two materials are calling to me, "Try me, try me!" but first I'm going to work with paracord to learn some basic braids. Then I can use that knowledge to do natural materials whether they be plant, leather or rawhide.

A little research info -- a plant fiber string, in most cases, would have to be twice the diameter of the sinew string to be of the same strength.

Now for that Internet site I mentioned in the beginning and an excerpt from it. Did this last draft have a website mentioned? Oh well, here is one.

http://www.primitiveways.com/cordage_in_North_America.html
"The stem sections of many different plants hold useful cordage fibers. Plants such as nettle, dogbane, velvet leaf, milkweed, prairie flax, thistle, and fireweed are valued for their quality fibers. I have processed many hundreds of feet of stinging nettle, dogbane, and milkweed cordage. These stems are hollow or have a pith core. They are collected in the fall after the last leaves have fallen off, usually after the first frost. The stems are left to dry in a warm place and then they are checked for brittleness. I then split them lengthwise, usually into four sections. These sections are easier to work with. Each section is carefully snapped every few inches, beginning at the bottom. As I snap each small section, I carefully peel the fiber bearing bark loose. Hopefully, I'll end up with a section of bark the full length of the stem. Short sections of bark are still useful as the fibers can be spliced onto longer sections of cordage. As I twist the sections into cordage, the dry brittle bark falls off leaving nice silky fiber. Sometimes the cord has to be twisted back and forth several times to loosen stubborn bark fragments. Some folks use a knife to scrape the bark off the stem before sectioning it but I prefer to just let it fall off while twisting. If you're not careful, you can scrape too deep and ruin the fiber."

I hope this spurs you to make a little cordage of your own. Remember, reading about a subject is great but if you really want an understanding of  it -- you have to do it. So stay tuned, this subject isn't finished. I'm not only seeing cordage in a survival sense but wouldn't a bracelet of milkweed be interesting. Of course a braided rawhide or leather one with mammoth ivory pendent would be divine. My daughters would love it for a Christmas present. Oh my, a thought just struck me.  What about our yaks long hair? I love horsehair braiding. A yak hair bracelet, now that would be cool!!

 Hm... the possibilities are limited only by the mind's imagination and mine is overly busy.

Wednesday, January 2, 2013

Chap Stick

 
Chap stick, lip balm what do you call this stuff? If it comes in a tin or small jar is it called balm? I've a hunch that chap stick is probably a brand name that became a name know for all lip salves in a stick.
 
 
 I don't know the answer but does it really matter as long as it works great and this chapstick formula does.Though this salve, chapstick, balm or whatever works wonderful, I am going to try a few slight variations. I can't shut my brain down with what if I did this or that so this experiment isn't finished by any means. It has been put on hold though because I need to use up what I've made so far. I'm speeding up the process since I'm sharing it with family and in doing so, I'm asking that they give me imput. So far though, I'm pretty happy with the results. 
 
One thing I do know for sure is that the tins are going bye bye. I'm not using chapstick tubes either. Not that there is anything wrong with them but this cutey pie thinks 'yip sticks' or chapstick tubes are a great art form. Yup, she draws all over the television set, furniture, and windows with them like a big waxy, greasy, crayola.  That's why I ordered tins. To try and out smart her but the tins outsmarted me. The lid is hard to get off. Next time I'm going for the tiny jars with screw tops.
 Another great lesson I learned was that a fine Microplane grater might make great tiny whisps of bee's wax curls that melt really quickly but they also stick to the container you are grating them into really well.
Larger curls done by a bigger Microplane (That's a brand name but any grater will do. I just love how little space these graters take up and the versitile design despite loosing skin frequently to the thing because it is so.... sharp.) box  may melt slower but they don't make such a mess and the time difference isn't that great from small curls to large curls.

This lip salve was just as easy to make as the first lotion. In fact, it is very similar except you put in more wax. Simply put everything in a pint size canning jar set in a pot of two inches of water, heat on low, and stir occasionally. Then when it begins to cool, you pour into your containers. For chap sticks you use an eye dropper to add salve to your tubes.

Recipe:
1 Tablespoon beeswax
2 Tablespoons cocoa butter
Heat  in a pint jar set in a pot with two inches of water.

When melted and well stirred then turn off the heat under the pot and add:
2 Tablespoons coconut oil
20 drops of peppermint oil

Stir until well blended and your done. 

The peppermint oil is simply for taste. It doesn't have any important qualities so if you want to add cherry oil or orange oil or whatever other flavor you like, do it instead. 
 
This lip salve is a bit oilier than what you might be use to because it doesn't have as much wax in it but believe me, your lips will love you. It might just warrant a few extra kisses from that special someone just so he can feel those tender lips once more.