Monday, April 1, 2013

Flour Tortillas Recipe

Whoops, hit the wrong button and posted two blogs on one day instead of Monday and Wednesday so beware. It won't be until the end of the week before I post again.
 
I made Pollo Con Creme and of course Flour Tortillas. I am in love. I predict that I will rarely ever buy tortillas again. Why would I? These are soft, flexible, and not nearly as chewy as the ones from the store and easy to make taboot.
 
 What is hidden in store products that makes them so different than if you were to make it your own? You can use the same ingredients as that on a store product's label and yet the products turns out very different. But the clincher is, are you really using all the ingredients as the manufacturer? We are not getting the whole story. 
 
This might be a clue. For instance the dairy industry is working on eliminating the need to put aspartame on the label of their yogurts and flavored milks. My question being what else isn't on the label now? 

Got diet milk? The dairy industry for the past three years has been hoping to sell you some under the guise of just plain "milk," so that chocolate and strawberry varieties that contain artificial sweeteners would no longer need to carry a special label.
 
Our daughter gets a migraine instantly with just a drop of this artificial sweetener often labeled as Equal. She is very concerned that this will be approved.
 
But before I get on a whole tirade I'd better stop myself because I get really worked up. Let me suffice it to say that I'm trying hard to eliminate the need to buy as many store food products as possible.
 
Just so you know, I used some potato flour in my Easter bread rolls, yum, yum. Okay, that was a squirrel moment.
Anyway, with this second batch, I used lard. They turned out even better than the first batch done with canola oil. Not surprising because leaf lard is the best for pie crusts.
 
I've read lots of tortilla recipes of Hispanic base that had lard instead of shortening or oil so I thought why not? Though I haven't seen a hint of anyone using ghee in tortillas I'm tempted to try.  That would add a lovely buttery taste and wouldn't that be good mixed with powdered vegetables in the tortilla shell for a turkey or chicken sandwich wrap?
 
As for lard, I'm saving store cottage cheese containers to put particularly leaf lard in from our pig we will hopefully butcher this coming weekend. I am determined that I will cook more with lard this year. Any is more than I did last year so I'm not talking a lot, just more.
 
 A lot of butter or lard may not be a good thing but in moderation it is a whole lot better than shortening or margarine any day. Though I make some butter from our goats, I still buy the bulk of it and so I need to work more on transitioning from my dependence to using my own lard, butter, and ghee.
 
I promised to tell you the skinny. Here it is.
 
Easy Flour Tortillas
From the Cook's magazine
 
2 3/4 cups of all-purpose flour
1 1/2 teaspoons salt
6 tablespoons vegetable shortening
cut into 6 pieces
3/4 cup plus 2 tablespoons water, heated to 110 degrees
1/2 teaspoon vegetable oil
 
This is the base. I of course never once used shortening. But the thing that was crucial that Cook's disclosed was the methodology and reasoning behind it. It is why I love the magazine.
 
You mix in a bowl the flour, salt and fat of your choice. Then with clean fingers work the fat into the flour until it becomes fully incorporated. It will be a moist flour, freshly ground cornmeal in texture.
 
Stir in the water until combined. The hot water causes the fat to liquefy and coat the flour and does not allow the liquid to absorb as well. This keeps the gluten from forming and creates the tenderness.
 
Cook's recommends leaving the dough in the refrigerator for a short period of thirty minutes after rolling into individual balls but I just left my dough on the counter and rolled out after the resting time.  
 
You may need a little flour on your counter when rolling out. I love my granite counter tops for you can often get away with kneading bread or rolling out things without flour and so they are more moist.
 
I couldn't believe how easy it was to get the shells see through thin. As for cooking them. I used my cast iron skillet. Cook's said the tortilla puffs up and this causes flaky layering but mine when it did this burst and I didn't like the results. I turned down the pan a little and cooked at a slightly lower heat. Each to their own.


 Now on to corn tortillas. Cook's has a recipe for them too. I just happened to have a corn tortilla press I picked up at a second hand store a few years ago and have yet to use.

This is electric and is meant to press and cook but my cousin doesn't like the way it cooks. I don't know if she used hot water to make her shells or not and so that may have something to do with why this press works for her. I have not eaten her shells and so I can't compare hers to mine. We will have to do that one of these days.
This is photo of the inside. She understood that this press is not for corn tortillas. I'm just glad I don't need another cooking appliance. But who knows it might work great for you.

Monday, February 18, 2013

Cattail Cordage


Cattail,
every part of the plant is useful. It is found in ponds and slow moving water. Water being the key ingredient and something we have very little of. Most of our standing water is man made reservoirs and ponds of a very small size. To give you an idea of just how little water we have, our wells on average are 300 feet or deeper. Irrigation, well, that is something other parts of the Wyoming have but we only dream of.

 Most of these watering holes are without cattails but we happen to have a man made pond on the edge of town with a few. Right now the roots are not accessible being frozen solid underneath a thick foot or more of ice. But come summer, we are definitely going to try eating the roots and repeat the experiment of making cordage. Oh wait a minute, I forgot to tell you, yes, the subject today is cordage from cattail leaves. 

Teaching Cub Scouts, my new don't have time to do but was talked in to pursuit, has led me to further explore knot tying. Of course my brain didn't stop there and I had to wonder what could we make cordage from in our area in a survival situation? Because face it, you can't do much of anything without rope. That is why survivalist replace shoelaces with parachute cord and tie parachute cord on to about everything in their survival gear.

I know squirrel moment here but have you seen those cool bracelets made of paracord with fishing line, weights, and hooks attached? Our son took it one step further and included a ferro rod as a latch. I've got to try that. And don't believe that drilling a hole through a ferro rod creates lots of sparks. My husband did so yesterday with no such excitement. This fishing gear, fire starter bracelet, would make a great addition to our Bug Out Bags. Toni has named hers Bob and she and I  are thinking about making a paracord belt for to add to ours. Not that we'd go around with them but we'd attach them to our bags and put them on when we bugged out.
 
But going even more basic than buying cordage is making your own. I've had a taste of this since I was a kid. My brother, use to buy basic hemp material and con me into helping him make pigin strings, since it was less expensive than buying the already made ones. A pigin string is a short thinner rope that you tie three legs of a calf down with to keep him under control and on the ground.
 
 My brother and I spent a fair amount of time doing just that as we were assigned to treat pink eye and other diseases that occasionally roamed through the large herd of cattle my dad managed. In a herd of five hundred calves they aren't all called Bobby and come when called, standing dossily while you give shots and probe in their eyes. Nope, if they have pink eye, they are half blinded and kick out at the slightest movement making dodge a survival sport. When medicating a calf without someone to hold them still, the pigin string became a handy tool. Since we did this from grade school on up, we also had to be held down in a fashion and treated for pink eye too, as hygiene is not a huge priority when you are young. Yes, I know pink eye intimately on several levels.
But cordage has more uses than this, just look around you, especially if you are on a farm, ranch, or homestead. If we didn't have a handy dandy hardware store available then what? We'd have to gather cordage material from the wild and prepare it and for most of us, that is something new. So far I've found cattail (the narrow leaf variety), yucca plant, milk weed, and I'm looking at different types of tree bark for cordage material in our area. Everything else I've found mentioned so far doesn't grow here and truthfully, yucca and milk weed are up north a couple hours so they don't either. I told you, we are on the BARREN plains.

As far as nettles, I'm still researching. Do we have them or not? Not here where Kirk and I live of course but up north again. I'm kind of hoping so because I'm hearing what a wonderful plant, weed, and  pest it is depending on your take on it. But to the herbalist it has cordage, medicinal, and food value.  
 
 Though some say dried out and grey is the color you look for in cordage material, I'm going with Ray Mears and other sites that state summer to be the best foraging time to pick and dry the material especially after making cordage from dried out winter starved cattail leaves. Then again maybe that doesn't hold true for all materials for another site said Milk Weed is best picked after the leaves fall. How is one to know? What works great in one area of the country may not hold true in another. Winter here means not a speck of green but in Kentucky there is lots of green in comparison, so I figure doing is the only true way of knowing.

Expecially since survialist avoid the open plains to do their shows. Seriously, Ray Mears came to Wyoming and showed walking across the grasslands followed by a horse and then did his show in the forrest. I'm not the only frustrated plains dweller for my husband follows Camping Survival on Facebook and they mentioned the same thing, calling for information on survival tactics on the plains. Frustration was the only response I saw.

I'm learning that preparing means not only reading and gathering but doing for especially on the plains there isn't much to guide us along the way. Hence, this summer we are going to try cattail roots and make cordage once more when the leaves are green and dried, to see what difference that makes. Then once more in the fall since we've already done winter. We will expand to Milk Weed and Yucca plants too when we can make the trip up north to gather them. We do hope to move to another area of Wyoming sometime to up our survival possibilities.
 
I'll admit I have a decided advantage to making cordage being a spinner because isn't spinning fibers into yarn simply making cordage? Softer yes, but none the less cord. I've use a broad spectrum of materials from a beef steers fluffy spring wooly cast offs to our Norwegian Forest cat's fur. Of course I've spun cotton, raimee, flax, mohair, quivet, a variety of wools ( Merino being my favorite) and even camel down and alpaca which send me into a state of bliss. Each requires minor adjustments in the way you handle them such as angora rabbit fur which I found wants to fly everywhere including up your nose but basically the method is the same no matter what material you use.
 
 So a cattail leaf is no different. It has a long fiber making that part easy but in its winter stage, it is very brittle despite a brief soaking in warm water. I did find ripping the leaf in half lengthwise to make the task simplier. Also pinching the leaf in half lenthwise gives it more supple. The narrower strands of braid I figure can then be further braided with other such strands to form a stronger rope. 


I'm not going into details on just how to braid cattails since there are scads of U-Tube videos on the subject. There just weren't many on how to splice in a new leaf to keep going but that too wasn't much different than what I do making yarn on the spinning wheel. Could I make this cattail cordage on the spinning wheel, not sure, I doubt it. I don't think it will at any stage have the suppleness required.
My biggest issue with this experiment was the breakage.
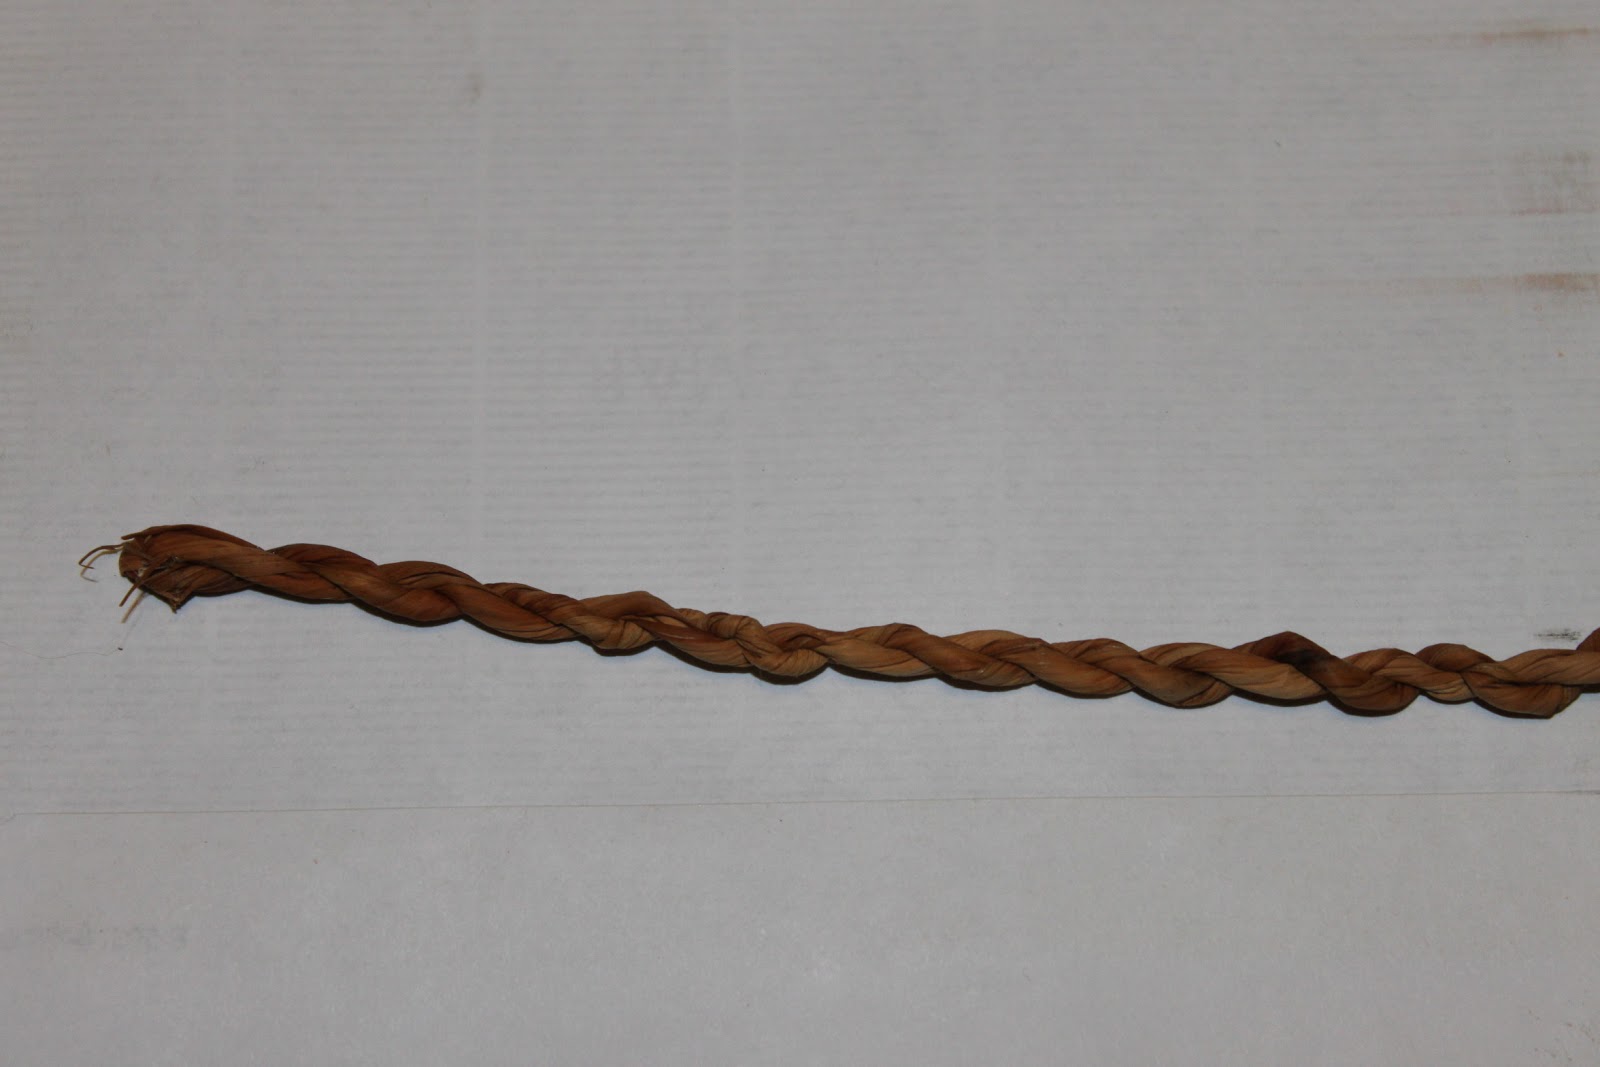
This is the whole cattail leaf made into cordage on the top and the bottom is the split cattail leaf. I see I should have twisted it a bit tighter. Remember that when you twist sharply away from you, the material unwinds a little to twist back on itself. There simply isn't a substitute for practice. The Cub Scouts and I did learn that this task is much easier to do with two people versus one.

There is another method of making cordage. I'd guess it would make the cordage last longer as you remove the cellulose from the plant which leaves strings. This I'm sure would lend itself to the spinning wheel. From what I can see and read, the method is basically the same as the process of turning flax into linen. This soaking, beating, and stripping is also on many U-tubes and will be what I'm wanting to try with Milk Weed and Yucca plants.

Tree bark cordage is also made in this fashion and we have a nice willow tree out back so this summer that is also on the list. Ray Mears on one of his shows makes a weak lye solution of hardwood ashes for soaking tree bark that was first lightly beaten. This would speed up the separation of the cellulose from the stringy inner material for he does this whole process in a few hours. Other instructors simply soak the materials until it smells rotten, which is a few days. If time constraits are part of the survival bargain, I can see one method being more helpful than the other. Which produces a better product, don't know.

Also does the renting process make a cordage that lasts much longer than simply using the whole leaf? I can't help but think yes, or why wouldn't they use the whole flax stem instead of renting it to make linen. This refining process I think would make a smoother and more flexible product also.

One critical need for cordage in a survival situation is for a bowdrill to start a fire. Our son has been using paracord for learning this technique. Would natural cordage make a difference? I know cattail cordage is not suitable for this but milk weed cordage is said to do well. And if we are thinking survivalist, then we have to think bow strings too. Hm.... my brain is a whirling now.

One of my problems in researching this subject is that most of the cordage information is from survivalist, not long term self-sufficiency-ists.  Okay, there isn't such a word but you get the gist. I'm looking into long term solutions. I can't help it, my brain goes there. I don't have a I've survived for 72-hours so someone has to bale me out now or I'll die attitude. I know this is the bag the government recomends and I agree people should have one because that is about as far as most people are willing to go without a hand out. But I'm not too confident in the government baling me out right now. It can't bale itself out. So I'm thinking more on the line of a survival bug out bag. or sticking tight and making do.

Now of course you can't talk about cordage and not mention rawhide and leather which lasts even longer than cordage made from plant fibers.  Besides, I love the look and smell of leather. And rawhide, well it is just classy. I admit, these two materials are calling to me, "Try me, try me!" but first I'm going to work with paracord to learn some basic braids. Then I can use that knowledge to do natural materials whether they be plant, leather or rawhide.

A little research info -- a plant fiber string, in most cases, would have to be twice the diameter of the sinew string to be of the same strength.

Now for that Internet site I mentioned in the beginning and an excerpt from it. Did this last draft have a website mentioned? Oh well, here is one.

http://www.primitiveways.com/cordage_in_North_America.html
"The stem sections of many different plants hold useful cordage fibers. Plants such as nettle, dogbane, velvet leaf, milkweed, prairie flax, thistle, and fireweed are valued for their quality fibers. I have processed many hundreds of feet of stinging nettle, dogbane, and milkweed cordage. These stems are hollow or have a pith core. They are collected in the fall after the last leaves have fallen off, usually after the first frost. The stems are left to dry in a warm place and then they are checked for brittleness. I then split them lengthwise, usually into four sections. These sections are easier to work with. Each section is carefully snapped every few inches, beginning at the bottom. As I snap each small section, I carefully peel the fiber bearing bark loose. Hopefully, I'll end up with a section of bark the full length of the stem. Short sections of bark are still useful as the fibers can be spliced onto longer sections of cordage. As I twist the sections into cordage, the dry brittle bark falls off leaving nice silky fiber. Sometimes the cord has to be twisted back and forth several times to loosen stubborn bark fragments. Some folks use a knife to scrape the bark off the stem before sectioning it but I prefer to just let it fall off while twisting. If you're not careful, you can scrape too deep and ruin the fiber."

I hope this spurs you to make a little cordage of your own. Remember, reading about a subject is great but if you really want an understanding of  it -- you have to do it. So stay tuned, this subject isn't finished. I'm not only seeing cordage in a survival sense but wouldn't a bracelet of milkweed be interesting. Of course a braided rawhide or leather one with mammoth ivory pendent would be divine. My daughters would love it for a Christmas present. Oh my, a thought just struck me.  What about our yaks long hair? I love horsehair braiding. A yak hair bracelet, now that would be cool!!

 Hm... the possibilities are limited only by the mind's imagination and mine is overly busy.

Monday, January 21, 2013

Potato Flour

With potatoes looking like the wrinkly knees of an elephant, I had to try something. Potato flour was the decision to try. 
I washed them, cut them into chunks, boiled them and slipped off the skins as best I could afterwards.
Crumbling the results onto a dehydrator rack I set it to high and let it dry. 

Dried...


 I then put them into the blender and came out with hard little shard like pieces. Not sure whether to put them into a wheat grinder or not. I may, they are dry. Wheat grinders hating oily seeds.

Wednesday, January 16, 2013

Mulitplier Onion or Potato Onion

 I'm perusing the garden seed catalogs on line and in paper form. I'm looking for a few things in particular, one being onions. I've been experimenting with onions for the past three or four years. First it was how to grow them since at one time I couldn't produce a decent sized onion to save my soul. I've moved on to producing seedThat requires either wintering over full grown onions in the garden or placing stored onions back in the garden the next spring.

Though sometimes when you buy bulbs from the store or catalog, weather conditions will prompt them to bolt straight to producing seed instead of a nice large onion. I had that happen with some of my red onion bulbs I bought super cheap at the grocery store last year.

My problem comes in when I try to start my onions from seed in the house. Three times I've produced spindly worthless transplants. 

 Last year I placed the seed directly in the garden and came up with some nice salad worthy shoots. I then took the greens and small bulbs, dried them, and produced a powder. Onion powder being a nice addition to cooking but it can't replace a hardy onion for frying with mushrooms on a home-grown T-bone steak.

So off I've gone to browsing through the catalogs and Internet for ideas how to solve my seed to onion problem and low and behold I made Columbus like discovery. No, won't change the entire world but it might just greatly alter ours. I found potato onions or multiplier onions as some call them. They bypass the seed to onion stage and go straight from onion to onions....  That I've got to tryThe concept from one onion to producing multiple onions in one plant blows me away. They promise that one small onion will create several larger onions and a larger size onion will produce numerous small onions. Something like what potatoes do, hence, the name.

The mature bulbs are small from a half inch in size to three inches but reportedly easy to peel the skins off. They keep extremely well, something that is becoming a big priority with me.

They are suppose to be planted in the fall but you can put them in in spring which will be what I'm going to do. I will then put a few in in fall to see if they can winter over in our area. Most I've seen are for zones 5 - 8. A bit above our temperature zone. I did see one variety listed in my favorite seed catalog and it was not under onions but under leeks. That is why I've missed it before and it doesn't have a whole lot to say about them. On the Internet not many sites tell about them either but those that do praise them greatly. 

Multiplier onions / potato onions are an old old breed once popular in home gardens. Then commercial production came along and they aren't what the mass production formula is looking for. That's okay, I'm not mass producing, I'm looking for self-sustaining and this onion looks like it will be right up my alley. I can see where those doing square foot gardening  and patio pot gardening could really use this space saving type of onion.  

This is a little of what one site had to say about potato onion or multiplier onions.

planting zone 5.
"Sources differ about planting depth, some saying shallow planting is appropriate and others calling for deeper planting. This onion does tend to grow very close to the surface and a planting hole perhaps an inch deeper than the diameter of the bulb seems to work well. The onions vary in size from half an inch to three inches in diameter (1 - 8cm).
Zones 5-8
Each bulb cluster of potato onions may contain many bulbs, averaging 2 to 2-1/2″ in diameter. When a small bulb (3/4″) is planted, it will usually produce one or two larger bulbs. When a large bulb (3 to 4″) is planted, it will produce approximately 10 to 12 bulbs per cluster.

Individual bulbs can be grown in flower pots to produce a steady supply of green onions during the winter."

I might just have to try the flower pot method too. And since I've traveled so far with fair success in growing onions, I'm going to venture off into trying garlic once more. It has hated me too but I'm going to figure out what I'm doing to offend it and make amends so I can finally get a successful crop. Yup, onions and garlic are one of my targeted projects for this summer's garden.

Tuesday, January 15, 2013

Making Potato Flour

Thought I had forgotten you. Well, hardly but I've a side kick that has decided that, "I'm living here forever and ever." or at least ten days she says. The last time she said such a thing I asked if she wouldn't miss her mommy she replied, while holding up three fingers, "At least three days." By George if she didn't stay three days, She's waning on the ten day thing though and has decided that seven might due.  That is until her mom came to pick her up and really all she wanted was a visit from mom and she was good to stay longer.

Though I've enjoyed her immensely, I do have a pile of work that needs doing and can't be done with her here, like livestock chores. It has been bitter cold here. Not the weather to take a tyke out in that's immune system has a tendency to be weak. She is so tiny for her age.

I've got the oldest grand daughters off to school today, there mom dropped them off early this morning, but the youngest, who's nine months old, and my side kick are here for part of the day. 

 I have been sewing up a storm since that I can do at the kitchen table while she plays around me. The sewing is for The Calico Bush. I'm building quite a stock pile of things to sell but still struggling mightily on the photographing. Once again the photographs turned out bad yesterday so I'll have to try again today after the kids leave. 

I've also been doing a great deal of research. The new Soviet like agricultural legislation that will be voted on in the next month or so has me really upset. The reporter's descriptive words not mine though I agree with the description of Soviet. That has set my mind a racing. If we had to produce even more than we presently are of what we consume, what would we do about flours for bread? 

Kirk can't survive without his bread or so he thinks and I'm not as knowledgeable about bread as I'd like. Being skilled at one bread just isn't going to do. I need to be able to use what is available for flour.  

We buy wheat but I have no idea how to grow it let alone enough space to do so. In that area we are definitely not self-sufficient. Grains are a basic staple for us and our livestock and are something we need to look into more. I'm thinking it would be smart to create a small patch of wheat in the garden this summer as an experiment, like I did buckwheat for a couple summers. I've still got that buckwheat to dehull and use as soon as I figure out where I put it. OOPS! The lesson therefore is not complete but I did learn a great deal about growing buckwheat. The biggest lesson being that it takes a lot of plants to get just a little grain.

Hands on learning is always better than book learning as anyone who has read about something and then done it can attest.  
I can 't grow an acre of wheat but some knowledge is always better than none. But what if?.... Can't you hear the gerbil cages whirling in my brain? What if we did some substituting with things we grow and could potentially grow? I've been throwing in my breads some dried corn ground into flour. We have dried sweet corn or dent corn as they call it and Painted Mountain flour corn.  Plus I've even thrown in a little dried beans ground into flour. Got that idea from one of my favorite kinds of chips.  
Potatoes are great in bread, what about potato flour said my brain one day? Sure enough, there are recipes for potato flour in breads, even sweet potatoe flour. Now that sounds good and we have some potatoes that are getting rather wrinkled or trying to sprout. Oh how I'd love a cellar. Best of all potato flour could stretch our wheat supplies if need be in the future.

 Wouldn't potato flour be great added to home-made pasta or tortillas shells too? Why not? The powdered beets, spinach, zucchini, and carrots that were puny in the garden and then dried and ground are great in pasta and I bet would be good in bread too. They would up the nutrition and add a complexity to the flavor. There isn't any gluten in those vegetables but none the less they could be added in smaller proportions to bread and in greater amounts in pasta and some tortillas where gluten isn't such a big factor.

This would help solve my waste not want not problem since I just don't like canned potatoes. I will bottle them when needed in the future but I have a tendency to waste them right now if bottled since they aren't a favorite. So the experimenting has begun.
I baked some sweet potatoes in the oven yesterday even though the recipes called for boiling them. 
 I'm such a rebel but it made more sense to me. Then I saved the skins for the chickens and mashed the potatoes on the drying trays. 
 I used the fruit roll up trays. It is drying now. It's taking a while. I think I'll spread them out thinner next time. I know I need to get them really dry, brittle in fact in order to turn to powder. I've then got to try the blender, the rolled oats grinder, and the small meat grinder to see what works best to turn them into flour.

Today I planned on boiling some small white potatoes from the garden but then I checked the sweet potatoes in the dehydrator and they aren't done. If I add white potatoes, the moisture from them will moisten up the sweet potatoes again. I'm going to have to boil the potatoes I have because they are too little to bake.  Sigh, baking is so much easier.  I am going to leave the skins on to boil and take them off afterwards. No sense trying to peel small potatoes.

Have any of you made potato flour and cooked with it?

Wednesday, January 2, 2013

Chap Stick

 
Chap stick, lip balm what do you call this stuff? If it comes in a tin or small jar is it called balm? I've a hunch that chap stick is probably a brand name that became a name know for all lip salves in a stick.
 
 
 I don't know the answer but does it really matter as long as it works great and this chapstick formula does.Though this salve, chapstick, balm or whatever works wonderful, I am going to try a few slight variations. I can't shut my brain down with what if I did this or that so this experiment isn't finished by any means. It has been put on hold though because I need to use up what I've made so far. I'm speeding up the process since I'm sharing it with family and in doing so, I'm asking that they give me imput. So far though, I'm pretty happy with the results. 
 
One thing I do know for sure is that the tins are going bye bye. I'm not using chapstick tubes either. Not that there is anything wrong with them but this cutey pie thinks 'yip sticks' or chapstick tubes are a great art form. Yup, she draws all over the television set, furniture, and windows with them like a big waxy, greasy, crayola.  That's why I ordered tins. To try and out smart her but the tins outsmarted me. The lid is hard to get off. Next time I'm going for the tiny jars with screw tops.
 Another great lesson I learned was that a fine Microplane grater might make great tiny whisps of bee's wax curls that melt really quickly but they also stick to the container you are grating them into really well.
Larger curls done by a bigger Microplane (That's a brand name but any grater will do. I just love how little space these graters take up and the versitile design despite loosing skin frequently to the thing because it is so.... sharp.) box  may melt slower but they don't make such a mess and the time difference isn't that great from small curls to large curls.

This lip salve was just as easy to make as the first lotion. In fact, it is very similar except you put in more wax. Simply put everything in a pint size canning jar set in a pot of two inches of water, heat on low, and stir occasionally. Then when it begins to cool, you pour into your containers. For chap sticks you use an eye dropper to add salve to your tubes.

Recipe:
1 Tablespoon beeswax
2 Tablespoons cocoa butter
Heat  in a pint jar set in a pot with two inches of water.

When melted and well stirred then turn off the heat under the pot and add:
2 Tablespoons coconut oil
20 drops of peppermint oil

Stir until well blended and your done. 

The peppermint oil is simply for taste. It doesn't have any important qualities so if you want to add cherry oil or orange oil or whatever other flavor you like, do it instead. 
 
This lip salve is a bit oilier than what you might be use to because it doesn't have as much wax in it but believe me, your lips will love you. It might just warrant a few extra kisses from that special someone just so he can feel those tender lips once more.  

Sunday, December 16, 2012

Goat's Estreus

The lone hold out. She's the only kid I haven't caught coming into estreus. She is the smallest by a little bit. Yet the whole female Nubian raise in my pen has been hard to decipher heat cycles in general.
 
But then in comparison  to my Saanens, which is the breed I had for years and years, who would come screaming up to the gate, the whites of their eyes in a full panic mode, their tails flagging to beat the band, and they let me know that they needed a buck and they needed him RIGHT NOW! So anything else in comparison would be more difficult.  
 These Nubians are a bit more shy and reserved. One might sidle up to the fence with Touch, our buck, and flag their tail a little but that is about it. You have to be watching pretty carefully.
 
This year has been more difficult than any other. My Meagan, our yearling on the right, flagged and was a bit more friendly than normal but no panic mode. She was in estrus for only 12 hours not the usual 24.
 
Then when Daisy, the black doe on the far left born in April this last spring year came into to heat, she just did a little wagging of her tail but not with the usual enthusiastic response we are use to. So I marked the calendar and bred her three weeks later when her tail wagged again. She is very large for her age but I none the less I wanted another month on her. I had thought I would be kidding Chicory and Meagan and then the younger does but alas, no Chicory.
 
And Mercedes was even more subtle than that. She wasn't over by the buck but I happened to be by the feeder and was petting each goat in turn running my hand down their backs and across the top of their rumps to their tails. She flagged enthusiastically but that was all, no interest in the buck. This will be an interesting match as I bred her to her grandpa. It will either be really good or really bad match.
 
As for Madeline, she hasn't come into heat yet. I stroke her back on down to the tail each day but no response but a light, wag, wag. Since Meagan didn't cycle the same time as Daisy and Mercedes and usually all does penned together for an extended period of time  will cycle within a few days of each other, I'm not sure what is going on. Light, short cycles, and not in sync hm.... must be the goofy weather.
 
None the less, without Chicory I have only two does I can breed to Touch and alas, I must sell him this spring.
 
Have any of you had strange estrus cycles on your animals this year?