Thursday, September 29, 2011

Painted Mountain Corn


Especially take note of the cob five from the left. The mixture of colors in just one kernel is amazing.


I had only put in a very small patch of this Painted Mountain Corn to try it out. It is reported to be very hardy and will grow where other corns won't in places around the world in differing climates. I was most interested in it's cold hardiness but alas, I got it in after the sweet corn because of the need to clear an area of weeds before planting.

I also failed to try eating it when it was young for it is also suppose to be good to at that stage too but a family emergency meant that I was gone helping during this critical time. This also meant my sweet corn was picked rather old but family comes first so I just added a bit of sugar when I froze it and we'll make due.
From the time this corn was a foot high it has won my artistic heart. Painted Mountain corn not only has beautiful cobs but the tassels are even painted.


Far more colorful that this sweet corn's tassels.
The husks were more lively than sweet corn's too as some were the same pale yellow color as sweet corn and others this rich dark burgundy. It made me think of how gorgeous these would be on corn dolls. Not something I'm likely to make because of so many other projects.
The size of the cobs was varied as some were very large such as this one and some quite small.

If it weren't for the fact that the sweet corn and the Painted Mountain corn pollinated at the same time them I would love to save seed from the colored corn cobs I favored the color of most and from those that were extra large. But you can see from the above photo of the Painted Mountain corn in the background and the sweet corn in the fore ground that they bred to each other because of the dark kernels on some of the sweet corn. Both kinds being heirloom breeds and open pollinated.
I've never grown corn meal type corn before and so I also am fascinated about the fact that the sweet corn when dry is all shriveled but the corn meal type is not.

For lack of room in the basement to lay out the Painted Mountain corn to complete its drying, I'm going to shell the corn and put it in the dehydrator on low to hurry things along. It is almost done already.

I can't wait to grind the corn and see just how it tastes. So far the tiny patch is a winner as the corn is especially high in antioxidants, the darker kernels are much higher even than blueberries.

Dave Christensen from Big Timber, Montana has been growing this corn and developing it for our high altitude and low nitrogen soils here in the West.

Dave says on his home page that this is the corn that the Indians and the homesteaders relied on. It is much higher in micro nutrients, minerals, and protein than today's commercial sweet corn. Commercial hybrids are bred for high yields, not nutrition.

That's why I'm most interested in heirloom breeds. After all isn't nutrition one of the major reason why we eat. Most Americans have forgotten that fact. The other reason why I'm interested in heirloom breeds is the potential for self-sufficiency. Self-sufficiency that is when I figure out what I'm doing. Oh how I wish it was so simple as just keeping the seeds and putting them in the ground once more.

If this breed proves to be yummy in corn bread, then I'll try it once more by planting it a few weeks earlier than the sweet corn in hopes it will pollinate at a different time as the sweet corn. Otherwise, I'll have to grow sweet corn one year and this corn the next. Meanwhile, I think I'll put some on the table with a Rouge... pumpkin. Fall colors always gives me feel warm, cozy, and content feeling.

For those who have e-mailed but I haven't responded to. I will get it done tomorrow or this weekend. Life is especially difficult right now but please don't quit writing, I love to hear from you. We will be hopefully hauling hay all weekend.

Wednesday, September 28, 2011

Fall Painting Chores

 Every year I paint the sheds just to keep them in one piece. You think I'm kidding but I'm not. A couple of our old sheds are pushing 25 years old and the one made of plywood is fairing much better than the one made of particle board. Take note. Particle board does not hold up nearly as long as plywood so spend the extra bucks -- it's worth it.  

As I debated about what to use to put the paint in that was out of the five gallon paint bucket, I settled on an old milking pail because I knew the paint would form a lovely skin that when dried would peel off in long strips leaving me once more a scrap bucket for the chickens. Since I don't use many packaged products from the store, I had no throw away container.

If it weren't for the goats I probably could get by every two years but they rub against the old buildings wearing off the paint. Then there is our tumultuous weather, (can I use the word tumultuous when I'm referring to weather?) a building won't last very long without some form of protection. I've tried helping hubby fasten tin to the outside of the plywood to try to make them last longer. (You know I had to come clean and say hubby did it or I'd get in trouble. You'd know the truth anyway since you've seen my new chicken coop. Handy man I'm not.) It does require less maintenance but still it rusts and you have to keep the dirt or manure from building up around the bottom because that holds moisture and it rusts. That's the case of one of the sheets of tin on the shed in the buck goat's pen. 

So painting it is to keep the two sheds lasting a little longer. I have to do it in the fall when most of the kids are sold and the one or two left are grown up a bit, not so inclined to bounce off the sides with their playful kid antics. With me once again being the primary grandchild babysitter, on this sunny school day I had our youngest who's two. This was a couple weeks ago so our oldest daughter was here and stayed an extra day to help corral our grand daughter. 


She of course is my little helper and had to paint too. Amazingly she painted for over an hour before once more returning to pouring grain from one bucket to the next. Her favorite pastime. Our oldest daughter may not of gotten much painting done but she was a huge blessing that day.   

Tuesday, September 27, 2011

Home - made Beet Powder

We spent the weekend in Colorado with our daughter and went shopping, shopping, and shopping some more. Not for clothes, though I did buy a 180 dollar wool coat for 57 dollars. It had been marked down and down and down for good reason. I swear the rack of coats weren't selling because of the big, honking, shiny buttons in a double row down the front which could easily have signaled an air craft carrier to land.

With three more on each sleeve and two more on the back, as I tried it on looking at myself in the mirror, I was nearly blinded by the over head fluorescent light that reflected off the buttons making me feel like a neon sign on the Los Vegas strip. "Look at me, look at me!", they seemed to scream. Okay, maybe it wasn't quite that bad but close.

Needless to say upon purchasing the coat, we went directly to a fabric store where we fastened black button after black button in the button holes down the front of the coat until we found some that were just right. They are plastic but look like black woven leather. A win win situation since wool and leather are two of my favorite things. 

Besides washability, it turned out to be a really good thing that those buttons were not made of leather for many of them are presently sporting chocolate. Yes, dark chocolate but what do you expect when you are shopping on a warm day and you need to go to two stores in two different towns to gather a small matching herd. You think I'm exaggerating but I'm not. I needed fifteen buttons. 

I didn't browse looking at isle, after isle, after isle, of lovely fabric, though it pained me terribly, I knew we'd spent enough time in the button section to wear my husbands patience mighty thin. So when I spied some of his favorite dark chocolate in the checkout isle, I grabbed a handful of the individually wrapped, mouth sized balls. Alas, he didn't eat them fast enough and some of them melted on the buttons in the same bag as we left the car in the sun to browse through a bulk food store looking for food for hunting camp.

We planned a foody trip. Not that we are short on food as I'm sti....ll canning and my kitchen floor has now been officially declared a  disaster area but in Wyoming, the selection is rather boring. So one of our stops was a kitchen store where I bought egg rings for making a nice egg shape that would fit nicely in breakfast sandwiches, and then off to the oil store that imports flavored olive oil and flavored balsamic vinegars from around the world. It is always an adventure to stop there.

And we scouted out two spice stores wetting our appetites and reeling my thoughts down new cooking avenues. One whole new trail is powdered vegetables. I picked up some powdered pumpkin and powdered beets.

Upon purchase, I didn't really know what all I was going to do with them. The long ride home and a brief trip through a few Internet sites ( and I do mean few there were only a few I found) broadened my thinking.  

The pumpkin powder I figured could intensify pumpkin soup, cookies, and might be good in hot cocoa. As for the beet powder, which is quite sweet tasting, I was thinking along the line of using it in noodles.

Though one of the clerks at Celestial Seasonings, where we stocked up the for the year on herbal teas, said she uses it along with Henna and coffee to die her hair red. I'm not hankering to be a red head  so I didn't ask exactly how she did that. Now that it's too late, I wish I'd of asked just to satisfy my curiosity. 

Thinking of dies, I looked up Red Velvet cake as beet powder is used in foods as a natural food dye. My husband loves Red Velevet Cake but has given up on me making one because I refuse to use more than a few drops at a time of food coloring. Several sites mentioned using beet powder as a substitute for the artificial kind. They all mentioned that the standard recipe has to be altered with the change because the leavenings react to the beets and turns the cake brown colored instead of red. BUT, with an addition of natural cocoa and buttermilk (which are both acidic) the ph change makes the use of beet powder plausible and a lovely burgundy color is said to be the result. 

Wanting to make my own beet powder, I of course made a bee line for the garden when we got home to pluck a few small beets that remained. They were an inch to an inch and a half in size. I cleaned off the garden soil and cut off the tops. Then chopped up the larger ones and popped them into the blender, pushed the  Chop button  and spread out the results onto the fruit leather trays of my dehydrator. No, I did not skin the beets. With small beets it isn't necessary as the skins remain tender.  The beets are in the drier right now and when dry, I'm going to grind them into powder. 

I think I'll do some tomatoes for powder to put into noodles, and I want to try some zucchini also. They would all be good in a vegetable stew to intensify the flavors and I'm also thinking noodles. A few years back, I tried some recipes of Martha Stewart's for noodles with green beans and beets. I wasn't impressed. Her beet noodles were an intense red. Mine a sorry pale pink. She didn't mention beet powder but now I'm sure that is what she used and failed to add in the instructions.  My brain is a whirling and I'm thinking what herbs to add to what dried vegetables. Look for fruition of those thoughts in the next few months.

Later when I process pumpkins, I'll dry some of those too. Have any of you journeyed down this road and have advice?   

I'd better quit thinking and get to doing as the grand kids will soon be out of school and I had better mop the kitchen floor before their feet stick fast and they are trapped. Then I have a bucket of apples to slice and peel. I'm thinking of freezing them for apple pies. Plus I've another batch of apple juice to make into jelly. Will this canning ever end?

Thursday, September 22, 2011

Pumpkins and Squash

Rouge Vif de'Etampes --can't wait until these beauties age a little so we can try them in pumpkin pies. Has anyone tried this variety young like you would summer squash? I've read you can eat them at that stage also. I've also read that these pumpkins make the very best pumpkin pie. We'll soon find out. The yield is awesome as you can see but they do take over the garden with their vigorous vines. And the weight of them I hope equates to a pretty solid interior which means a high yield.

As a note, the boots next to the pumpkins are our six year old grand daughters, not mine but these are big pumpkins. They were fascinating how they start out yellow and then turn orange and finally this red blushing orange.
I also grew another small pumpkin that was suppose to be good in pies. I'll have to go down and look up the label but alas you'll have to find out when I cook them for the kids are here again so I can't tarry.

I will state that the Delicato are so far a big disappointment. They are suppose to taste a bit like a sweet potatos but even though I love sweet potatoes, the yield is too low and the size too small to warrant a space in my garden. I'll go back to raising Buttercup, my favorite. I also love Hubbard squash. Oh my, I could really get into growing all kinds of squash  and pumpkins if it didn't take up so much room. Alas, I'll just have to grow a few different kinds now and then to test them out to determine what will be a sure winner here, up north.

Yield and flavor the two determining factors.

Wednesday, September 21, 2011

Family, The Bestest Thing Ever!!

 Family is the bestest thing ever!!! Okay, that's bad grammar but it's true. One look into these cute little grand daughter's eyes and my whole world lights up. This morning, we ran around finding clothes for dress up. This week is homecoming at the high school and the grade school participates by dressing up too. Today's theme is western days.

 And last weekend we were blessed to have our oldest daughter with us. The grand daughters think their Aunt Toni is the best and well, she is. We reminisced by picking pumpkins. The grand kids loved the variation of an Easter egg hunt as they scrambled amongst the wilting vines looking for brights spots of red or orange.

Our daughters and us laughed as we remembered when they were little, shivering in the garden dressing up in coats, hats, and mittens as the whole family hurried to gather in the harvest before the night's frost destroyed it.

It might not have been the best memory for them and they might have much preferred the picking the garden in their shorts as the grand kids were doing but frost has waited patiently for the garden to come to fruition. Maybe not everything is done but we wouldn't of had much if Jack Frost had arrived on his usual schedule the beginning of September so I'm very grateful to the Lord.

When we finished picking pumpkins, we moved on to picking the apples off our small trees. Then yesterday, I picked three and a half - five gallon buckets of tomatoes and a bowl of zucchini, and more peppers, and... and... It was just in time too, as we woke up to 28 degrees Fahrenheit. Br....

I've still potatoes to dig and dried corn to pick, and buckwheat, and a slim maybe on dried beans along with a hope full harvest of  sunflowers seeds bu they can wait as I deal with that which we've already picked.

All this harvesting makes we feel a kin to the pioneers. We are so blessed though that what we raise doesn't have to be all the we survive on. How ever did they do it?
But work and no play makes for a dull boy they say and so first, last weekend, we had a bit of fun.

 Our oldest daughter, whose very creative, drew butterflies with the girls and they posed as the body in the middle of the wings.

 And earlier in the week we finally got around to taking the girls fishing. Sh.... don't tell them they were catching tiny little trash fish because they thought it was really something.

Our middle grand daughter's favorite part was digging for worms. The fishing she wanted to skip for playing in the park but after her two year old little sister had caught two, she decided she was being out done and caught two herself before calling it quits.

It didn't take long for we'd cast the line out into the pond and as the kids slowly reeled it in, the Blue Gill near the shallows nabbed on to the wiggling worms and the kids were guaranteed a tiny fish with every cast. Yup, it's a real ego booster. Just right for those with very short attention spans.

Tuesday, September 20, 2011

Home-made Chili Powder

 All the pepper plants were loaded with peppers. I really should have snipped some off weeks ago since the large volume meant there wasn't enough energy for the plant to produce large peppers. 

So what oh what shall I do with them? I tried canning jalepeno peppers a few years ago and found them to be a bit mooshy. Feel free to tell me I did them wrong and give me tips because I'd love to know how to better can them. 

Hmm... maybe that is why the store ones come chopped so you don't notice the mooshiness so much. Hmm..... that's one to think on. I just might have to can a few jars but then a half pint is just too much chopped peppers for the two of us. I'll feel mighty guilty wasting them. The chickens aren't going to like left-over chopped hot peppers so what's a girl to do.

This is my solution. I chopped off the stem end of the jalepenos and the mystery peppers. The plants I bought at the livestock feed store and forgot the name of. Imagine that with all I have going on in my life? Then I split the small peppers down the length of them and put them in the food dryer on low as to not loose too much nutrition or burn them. Yes, my dryer can get hot enough to burn some vegetables. I also dried some onions and some bell peppers.
All of these dried peppers and onions went into my blender. With it a bit of chopped dried garlic. Voila, chili powder. The result is a rather hot but then I'm a mild kind of gal. The flavor is nice and complex due to the combination.

This coarse powder would have been really pretty with some red peppers BUT, last night and tonight the forecast is for low thirties Fahrenheit. Clearing the garden of produce above ground has become a priority ad I can't wait for the peppers to turn red.

 So with my pint of green chili powder I'm thinking of using some of it to simmer with some tomato juice to make some hot sauce. The juice I'm going to make when the three and a half -- five gallon bucket loads of tomatoes I just picked and laid on my basement floor, ripen and turn red. 

This chili powder would be good in enchiladas, breakfast burritos, chili and.... Yup, this project has my brain a humming. I just picked a few more peppers this afternoon and I'm thinking of drying some of the milder ones along with onions, and dried bell peppers and making a powder with a lower heat index for me.

You might think I'm all smart doing this. Think again. It was a mild panic that started this whole process. It was when I was staring at my pepper plants wondering what in the world I was going to do with them and the thought popped into my mind, how do they make chili powder?

You know where I went and what I discovered is that each commercial company has their own mixture of dried pepper varieties that they dry and turn into powder. Usually garlic is added and sometimes oregano. Some like to make it hot and some mild but any way you look at it easy peasy as Farmgirl Cyn would say. Since what I had was jalepeno and these mystery peppers, that was what I used.

Of course these thoughts led me to wonder how to they make paprika and what I discovered is that it is a mild pepper nicknames tomato pepper. I think I'll try growing some next year along wit a few other varieties as I venture a bit further down this peppered lane.

Thursday, September 15, 2011

Stress Reliever

This will be a three ply yarn when done that I've washed the wool, carded it, and am now spinning. Each single added to the ply makes the yarn more round. After this sometime I want to do a four ply. Four plys makes the cable in a sweater jump out at you. Why I haven't done three and four ply before is beyond me.

Boy, oh boy, have I needed a good stress reliever lately. To keep from going in sane. Hmmm... okay I'll admit it, I'm already there. Who else would think of an experiment with a stinky buck goat and women who wish to become pregnant? So let's just say that to keep from needing a padded cell or hours on the couch with a psychiatrist, I've resorted to spinning and now I've added knitting too in the evenings. Sometimes even late at night like last night in order to calm my nerves. 

Fall and spring can turn one into a basket case with so much to do and so little time and energy. I think I have my life under control and then the real world slips in with grand kids needing help and a good deal on a buck, and yaks needing doctoring which means we need to find a good deal on a used squeeze chute, and... and... all those things that just weren't in my planned schedule.
So I dug out my packet of luxury fibers I'd splurged on at the Fiber Fest in Estes Park last June and finished spinning them. Three of the six fibers I've never spun before such as Paco Vicuna, Cashmere, and Quiviut.


The Paco Vicuna was somewhat like spinning Alpaca and a bit like spinning baby camel. Not as easy as Alpaca but not quite as short a fiber as baby camel.


Quiviut, which is from a Musk Ox, at first had me wondering if stress relief was the correct word or not for what I was doing.
Awesomely airy but the fiber length was maybe an inch long if stretched tight. Quiviut  doesn't have any cling to itself and therefore you have to make your singles very thin and do a really short draw of the fiber with lots of twist. The gal I bought the luxury fiber packet from said it was a super good buy since the quiviut down had risen to $50.00 dollars an ounce for fiber to spin. Ouch!!

On the Internet I saw Quivet yarn hats selling for $125 to $175 dollars in a single color with a fairly plain pattern. Yarn sells for $90.00 dollars an ounce for finger weight. Needless to say I won't be buying this fiber again unless I happen upon a bargain basement sale, NOT LIKELY. That made the $37.00 dollars I paid for the little packets of six fibers seems pretty reasonable.

Quivet comes from the Artic Musk Ox. It was inside me new book, that is a must buy for any fiber lover, that I found out that Musk Ox stay warm to -100 F. or -73 C. If only this fiber wasn't so expensive I'd make sweaters, hats, socks, and gloves from it and bask in its softness and warmth for I do get mighty cold being cold blooded, literally. I'm serious, my temperature frequently falls to the low 95 F. and even dips to the 94's on occasion. You think they'd give me a medical discount for this fiber? LOL 

The Angora, from the Angora rabbit, is soft and tends to want to fly away a bit. You handle it also with a short draw, thin singles, and lots of twist. I've a pair of socks I blended wool and angora to use in the ankle part. Is it called a cuff?
The baby camel as always was a shear joy to spin and I liked the Cashmere too. Other than the camel, I haven't bought any of these fibers. 

Some of you clever souls may of noticed I didn't mention the bison down. Either I had some poor quality stuff or it is simply nasty and after working with it for a short while. I quit. After all, I was suppose to be basking in luxury, not a prickly lane of desperation.

There isn't much of one fiber and what I'll do with this little bit of this and a little bit of that I think will be to add a few similar sized skeins of colored finely spun Merino wool and make a head band. 

I spun and knitted one years ago from what at that time was unfamiliar to me luxury fibers which included baby camel, Alpaca and silk. I loved that head band but set it down at the hospital on a chair and moved away from it, when I turned around and came back, it was gone.  This one I'm not letting out of my sight.
My oldest daughter shares this love of fiber and has begun to spin on my old Ashford spinning wheel. Looks like we may have a grand daughter that will join us when she's of age.

She just had to stop on our walk last summer to pet the clump of fur (nobody home inside it) in the middle of the road before walking on. I see myself a great deal in this little one of ours and just hopes she skips the not so good traits of Grandma's.


Wednesday, September 14, 2011

How to Wisely Empty Jars To Fill Them Again

What happens when you are canning from your garden and along comes 100 pounds of tomatoes, 60 pounds of pears, 60 pounds of peaches, and 40 pounds of apples? You run out of jars to put everything in.

With the high price of canning jars, I can't afford to buy any more of them and pay for all the fruit I had bought off the truck from Colorado. Even if I could afford it, I wouldn't have any space for any more jars on our food storage room shelves.

So the most logical option is to empty some of those I have from past years. Every canner knows you need to rotate your food or it gets old and looses nutrition. Plus, the fruit such as peaches and pears turns darker each year as it looses nutrition value besides not looking very appealing.

You and I both know how much work it is to can and so I'm not going to throw out all that hard work. So I don't. If it is green beans or the like, I feed it to the chickens or pigs. If it is fruit, I make fruit leather.

I suppose if I didn't have livestock I'd throw it in my compost heap but I prefer to put the food in that pile after it's final journey. Yup, when it's matured and landed on the ground. It's called manure but I think of it as brown gold for it starts the whole food cycle all over again.  Placed in a garden, it produces lots of vegetables which....  

Yesterday it was bottled peaches that were emptied so I'd have more jars. And since some store canned pineapple also needed to be used, I mixed the two.

 The peaches were from 2008 and the pineapple was from the same year. I don't mind the bottled food being three years old, though it is lower in vitamin levels then it was a couple years earlier, but I don't like store canned food getting that old. The food's acids eat the metal and when you eat the food -- yup, your eating the metal too. Normally, I don't let it get much past a year and a half.

I try not to have anything more than two years old in my food storage. I do want to have enough of fruits and vegetables to last me over a year since crops do fail. This year I didn't get very many jars of beets. My experiment of interplanting them amongst the broccoli didn't work so well because of the over crowding. I thought I'd timed the harvest of the two a bit better but the broccoli grew much faster than anticipated and overgrew the beets, shading them --lesson learned. I still have enough beets for this winter because I had a really good year two gardens ago. That left me free to experiment.

Without any real recipe, I put in the blender bottled peaches and canned pineapple that I'd drained the liquid from. Then I added just a tiny bit of sugar and turned it on liquify.

I poured the mixture into my fruit leather trays in my food dehydrator. I always fill the trays as high as they will allow, about  3/8ths an inch. This makes a nice thick leather that peels off easily from the plastic tray without ripping into pieces.
When dry, about 24 hours later, I tear off a piece of wax paper of comparable size.
Put the wax paper on top of the dried fruit roll up and then roll inward so the wax paper keeps the fruit from sticking to itself.

 If I make a large batch and wish to store it for an extended period of time I recommend using a seal-a-meal. The reason is there is still moisture in the leather or it would be brittle and not roll. I've also put fruit roll ups in a zip lock bag and put them in the freezer. Otherwise the quality is compromised if left more months.

 If the kids are around, they don't last that long. Our oldest daughter is coming up this weekend and she loves them. Her sister loves them and our grand daughters love them. I'd best save a few for our son because he too loves them.

Sometime this winter I guess I should go through my frozen fruit and see if any of it needs used up because it is getting old. Grandma -me- is always popular when she does this.  

Monday, September 12, 2011

Touch of Classic has arrived!!

Our big boy has arrived. What a sweet animal. He loves attention and is perfectly willing to share his strong perfume as he gets all gussy upped to impress his new girlfriends. Yes, he's been peeing all over his self with every new supply of fluid his body can produce.

Kind of reminds you of a bull elk in rutt doesn't it? Yeah, neither one smells too good.

We met Karen Butler from Mega-milkers in Wheatland and transferred Touch from her pickup into the back of ours. We could tell it was a difficult goodbye as she kissed him then asked us, "Be sure and tell me that he got to your home safe and sound, will you?", before she turned back towards her pickup. 

We, of course, e-mailed photos of him to show he arrived all in one piece, and of our does too so she could see the shiny, healthy coats on them and know he would be well cared for also. Plus, she could see that Chicory, who was once hers, is doing well. 

When we arrived, Kirk first stopped by Chicory and Meagan's pen. You know cruising for chicks like we use to do as teenagers. Then when we had Touch's interest peaked, Kirk drove off a ways to drive down into a borrow pit so as to tip the tailgate of the pickup low enough for Touch to jump out safely.

I had no problem getting him to come along with me back to our pens. Yup, he'd seen the girls, determined they were cute, and now he wanted to meet them.

Chicory greeted him through the fence but soon grew bored with the whole greet and meet thing.

Meagan, on the other hand, acted like a typical teeny bopper and kept staring at him glossy eyed. You could read exactly what she was thinking. "Wow, he's cute! I hope he notices me."

Being the three-year-old that he is, all sophisticated and knowing in the ways of women, he also soon lost interest in the opposite sex and instead checked out his new pen, then wanted our attention to insure himself that he'd gone to some nice folks.  

He was fine yesterday but today he mistook me for one of THE girls and his bu..., bu..., bu..., bu...s and front pawing of his hoof was met with a light, but firm, tap.

" No, I am not going to be one of YOUR conquests, I'm already spoken for." I let him know as I glance up at my husband. Since I'm on a large number of hormones because of my Addison's disease and I take many of them in a natural order of a women's cycle throughout the month, I happen to know just where I'm at. Yup, our big boy called Touch of Classic has me pegged right on. 

You know my brain, yes, it has wondered off on to a path that it probably shouldn't. I am curious though. How effective would it be to parade a group of women, wanting to become pregnant, by a buck goat to see just when the most opportune time is to have a romantic rondevou (how do you spell that word?) with their sweetheart?

Of course only the desperate ones or the ranchy type would be able to stand a buck goat in the fall when they are peeing all over their front legs and smell to high heaven.  

Kirk says I have to close and not tell you what else I'm thinking. Yup, I don't suppose anyone wants to be a part of an experiment like this one.

Thursday, September 8, 2011

Home Canned Tomato Soup

 Looking for a way to use those small cherry tomatoes or the medium sized tomatoes that just aren't big enough to bother slipping their skins off to can as stewed tomatoes?  Wow, that was a long sentence. Well, I've got just the recipe for you. 

I use this recipe with a few changes here and there. Don't act shocked, you know I can't keep my hands off a recipe. I do promise you that the changes are improvements and that this recipe, if modified in ways I will soon reveal, will become one of your favorites too. My daughters think it makes the most wonderful addition to home made chili. Curious yet, read on.  
Let's head out to the garden and pick those ripe little tomatoes and  begin cooking.

Some of you will be glad to know I've skipped the cooking of the whole medium to large tomatoes in hot water just until the skins slip off stage. For me time is of essence so I just put my small to medium or even large tomaotes in the blender with the skins on, of course minus the hard little top piece where the tomato attaches to the vine. Be sure and push the button to chop only after you've the lid on tight because a red ceiling is not what were after here.

10 quarts of tomatoes is what the recipe calls for but I have a tendency not to measure the tomatoes and the following ingredients when I shrink the recipe way down. Exactness is not one of my strong points. Sh... don't tell the County Extension agent. They get all huffy about such things.

For you special folks, I'm going to try and keep these instructions clear, though they might end up clear as mud, by giving the process  and not the proportions first. The actual amounts will come at the end.

If your tomatoes are all blended then this next stage is where the V-8 type vegetable juice and the tomato soup recipe change a bit, though you can certainly make the V-8 type juice and use it as tomato soup. Confused yet? 
Continue on anyway, maybe this will help. Next, put your blended tomatoes in this thing-a-ma-jingy. Sorry, I don't know it's proper name, and move the wooden block around and round. The skins and seeds will be left in the cone frame and the juice will go into the bowl. Be sure and give the seeds and skins to the chickens or put them into your mulch pile for the garden. 

Then take a cup of this juice and put it back into the blender along with celery, onions, and bell peppers. That's so when you push the chop button, the vegetables won't get stalled in chunks encircling the blades.


This is whereV-8 juice and tomato soup  depart from each other-- if you choose.  For V-8 juice put all the vegetables and tomato puree into a stew pot and simmer for an hour or two. Then put this mixture back through the thing-a-ma-jingy to leave the small vegetable junks behind. That gives you V-8 type of juice for drinking.
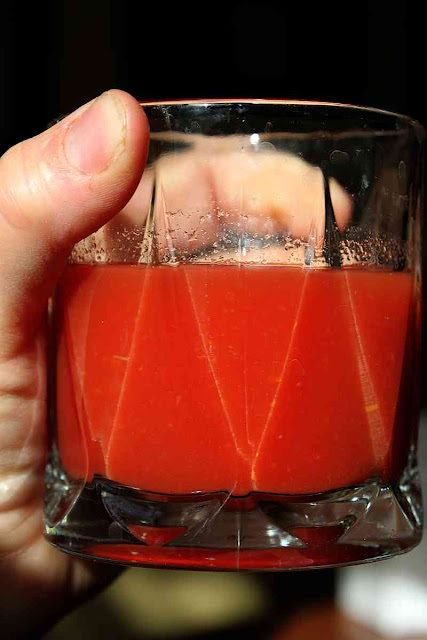

If you want tomato soup and you like a little texture, then you simply dump the chunks in with the tomatoes and skip the step of simmering on the stove. You simply get the mixture hot to pour into clean canning jars. 

This next part is where the recipe and I really part ways. It calls for using margarine (which I'd never use but instead substitute butter in it's place), and flour to thicken the soup along with salt of course.

I'm uncomfortable about using the flour, don't ask me why because I haven't a good reason. Beyond that icky feeling about putting flour in canning, I like to leave my options open to how I will use my tomaote vegetable mixture. If I thicken the soup, then it isn't quite as suitable to use in Italian dishes and in chili and I don't need all the fat the butter adds.

So I just can it without and then add a touch flour to thicken along with some fresh goats milk when I make the canned tomato/ vegetable mixture into soup.

Adding flour and butter also messes up the V-8 juice drink and as for the salt, well, Kirk likes it without and I like mine salted so skipping it means we can both salt our final product to suit our taste buds.

Now for the final unveiling of the recipe that I kind of follow. LOL

Tomatoe Soup
10 quarts tomatoes 
2 or 3 green bell peppers
2 or 3 celery stalks
2 or 3 onions
(Process in any one of the methods I mention above)
++++++++++++
To the hot mixture above add
1 1/2 cups flour
1/2 pound butter
1/4 cup salt
Mix as you would gravy to fully incorporate the butter and flour.

Make sure it is hot and then pour into clean canning jars. Screw on canning lids and pressure cook  for 30 minutes at 12 pounds pressure. 12 pounds because we are at 5000 feet elevation so adjust according to where you live.

I haven't given you any detailed instructions on the proper method of canning so if you are a beginner, you'll need to crack open a canning book for those.

Voila, I finnaly gave you the recipe.

Since frost will certainly be coming one of these days, for those of up way up north, and all our tomatoes - never - ever all turn ripe before it does, if you request, I'll give you an awesome recipe for green tomato relish that is great on hamburgers and hot dogs.

So get to asking by either commenting on this blog site or e-mailing me at hollyrexroat@gmail.com. I'm lonely all by myself canning eight boxes of fruit and four boxes of tomatoes and my garden produce of green beans, concord grapes................. Oh my, I'm so insane. LOL 

Tuesday, September 6, 2011

Soon To Arrive

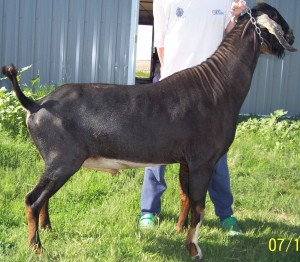
I've got to tell someone. I'm so excited. Look at all that testosterone. I've been drooling over this buck's picture are a month now and I can hardly believe it but Karen from http://www.mega-milkers.called me up and asked if I would like to buy him. She has several daughters that she has kept from him and since she has such a small herd, very many more and it would be her entire herd. She will of course still have the option to breed does to him and her daughter who doesn't live very far from me will be needing his services this fall. That was part of the deal I was glad to agree to. 

When she e-mailed me Sunday with her proposal, Kirk and I debated over him all day throwing around the pros and cons of buying him but the fact that this big boy is already a Grand Champion and  has proven himself in the quality of daughters he has produced so far, he's only three and his linear appraisal score at two years old tipped the scales in his favor over a newly born buck  who's future is completely unwritten. The cost of course is far greater for him over a newly born buck but still the pro's way out wayed the cons on our list. 


This has thrown my entire plans askew and sent me in a dither since I had chosen does from the Mega-milker herd to buy a doeling and a buck kid from next spring. Now I feel like I need one more doe but alas, most herds have already culled their numbers and have none for sale. The two herds I was looking to buy from anyway.

And as reality sets in, I really should be patient because we need a squeeze chute worse than we need another doe and we need new hay feeders in a really bad way also. Texans have bought up a great deal of the hay in our area due to their severe drought, causing the price of hay to skyrocket.  So that very precious commodity can not be wasted in any way.

Oh dear, what should I do with so little money and so much desire.

I guess I'll just be happy and keep searching for that used squeeze chute, (I have a couple possible leads) while I make arrangements to pick up our new beautiful big boy.


Monday, September 5, 2011

New Coop

Today, three cute chicks in the new chicken coop were a crowing to beat the band.

The youngest one was the cleanest having first stood in the sprinkler to soak her pants and the bottom of her shirt.
 The coop may not be real pretty and it may not be extremely well made since it was built by me, but it was cheap, cheap, (get it) and it will be warm come winter.


The shipping crate the coop started from came from my hubby's work after sitting on the mine site for a couple years then sat at our house a couple more before I got around to making this small coop. By then the box was a bit warped but a few more two by four boards straightened it out enough to make it functional. The addition of insulation left over from residing the house made it far warmer. Plus some plywood, the thinner kind, added to the outside gave it a solid exterior. I used left over paint for the undercoat. Then I used left over pale pink paint for the interiors last coat of paint. I'm sure it will delight the one year old hens. After all doesn't every young female love pink? Okay, I didn't at that age but then I will confess to being rather different than the crowd. But I'm sure these girls will appreciate the feminine color along with its light reflecting properties. 

Efficiency is the name of this game and that's why the door is also the window. The roof of the coop can be easily removed for cleaning of the coop.

My coop may not look like a beauty and I may not be able to walk inside to gather eggs but the price was just right. The girls, meaning the hens, will appreciate the warmth that the low ceiling will give them in the fifty below wind chill when the howling winds are frost biting anything exposed and that includes combs.

They will appreciate the fact that coop sits on the ground not up in the air over a run. I know a run built underneath is efficient but it also makes the thing mighty cold in the winter and with the high winds we get, there is a good chance the coop will get blown over. Never under estimate our winds for I've seen four horse sized sheds blown over if not face in the right direction and secured to the ground.  

And though the kids have really enjoyed playing in it pretending that they are the hens, today we will be hauling home cow panels to frame the run. Somehow I think the grand kids will enjoy having hens in the coop just as much. 

I haven't forgotten about the tomato soup but it's my birthday and I'm going to go and celebrate.