Tuesday, November 30, 2010

Lemon Extract Home-made

I did it. Whether I did it correctly still remains to be seen. But I smooshed several recipes all together and made my own concoction of lemon extract. Unlike the recipe for vanilla, I found lots of variations on how to make it. I figured with so many to choose from, I could create my own and not be far from the mark.

The first step in all the recipes was to use a vegetable peeler and remove the yellow part of the rind from the outside of the lemon. The white pith is bitter and should be left behind. At first I put my lemon aside but later changed my mind on what I was going to do with it.
But we'll get to that later, I chopped finely the yellowy part of the rind, the zest, into small pieces. I don't know why you couldn't use a zester but since I didn't have one, I used a peeler. This macro photo makes the pieces look large so don't be deceived by the photograph, the pieces are actually very small.
Then I mixed a half a cup of vodka plus a half a cup of water
in a pint sized canning jar with the lemon rind. The recipe didn't say triple distilled vodka but since my vanilla calls for it, why buy a large bottle of vodka and not have it meet the requirements of all the extracts I wish to try? It isn't like I'll ever drink the stuff.
With the 1/2 cup of water, 1/2 cup of vodka, and the lemon peel it looked wimpy. The color a little less lemony than I'd like. I scanned the recipes once more wondering if I should have used the other one which called for a 1/4 a cup of water and a 1/2 a cup of vodka. I also questioned if I should have brought the vodka and the lemon rind to a boil on the stove like yet another recipe recommended. I realized I wouldn't have this problem if I wasn't an information junky and had just looked up one recipe. Like that would ever happen- NOT!- so I plunged forward.
Looking at yet another recipe, I chose to add the juice from the lemon which it called for. I like my flavors more intense than many so this suited my tastes. Besides, if the extract was intensely lemony I could always use less in a recipe. I've suspected that some extract companies make their products weak so you will use a larger amount hence, needing to buy the product more often.


With the process so easy, except for the agonizing over what recipe to use, I've wondered why I haven't tried this sooner? I slid the making of mine during the time I waited for supper to cook. Now that I'm done questioning what recipe to use, I'm wondering how long to let it steep, brew, or whatever the proper term is. Some of the recipes said three days and some five but that's neither here not there since it is only a few days difference I decided and thought it could brew, steep or whatever until I was ready to make our favorite lemon pound cake. A cake I like to have frozen to take out when I need a dessert in a hurry.
Eventually, I am going to strain the extract removing the solids from the liquids, something none of the recipes mentioned. But then this is my own extract concoction and I figure I can do with it as I please -- everyone else seems to have.


Don't leave me alone in this experiment, give lemon extract making a try and be sure and let me know what your results are. Christmas is fastly approaching and extracts would make a wonderful gift to those cooks on your list.
Next, I'm going to try mint extract so stay tuned and then it will be orange and almond and whatever else I can find that I think I'll use.

Monday, November 29, 2010

Making Yogurt

Thank you all for your kind words and thoughts. My mom is doing quite well, miraculously in fact. The doctor said they are amazed that an 80 year old woman with severe osteoporosis could have fallen down 15 cement stairs and come out looking so well, very black and blue, scraped, and three fractures in bones connected to the hip. Not a fractured hip as they first thought. That meant she didn't have to have surgery but one of the fractures is on the left side of the sacrum which is an extremely painful break. Pain management and time are the cure along with some blood transfusions for the minor internal bleeding. She will be in the hospital for a few days and then move to a long term care facility until she can get around a little on her own.
Now I really must tell you about my yogurt making experience.
Years ago when our kids were young, I use to make yogurt but not with great success. Every time I mixed up a batch it came out sloshy, not firm. I pretended it was Keefer, a drinkable yogurt like product, but after a while I just quit making it. I used an electric yogurt maker and shifted to making it on the tove top by placing jars in a dutch oven partially filled with water and preheated that was heated to 115 F. But, the stove top method rusted my lovely dutch oven and neither the electric model nor the stove top method was making a firm yogurt. I gave up. Yes, yogurt makers I did try adding powdered milk and about gagged at the taste.
My wounds of failure now healed, I decided with my resolution to use my goat milk to the fullest, I had to make yogurt. Once again I bought an electric yogurt maker. I just don't have time, with three little ones, to fuss with the stove top method working on getting the temperature just right and holding it there. If I have to buy a non cast iron dutch oven I might as well buy a yogurt maker and besides I figured I'd save money since we do eat lots of yogurt.
My first try was a HUGE success. Don't know if it was the fact that I did not use whole goat milk or what but this is firm yogurt. Yes, I'm holding a jar of it upside down and it doesn't show the slightest hint of falling out. That is FIRM yougurt.
Was it really the difference in the milk that made the yogurt firm? Don't know yet but I'll find out in the next day or two as I'm going to try making whole goat milk yogurt. What I did this time was separated milk through the milk separator once saving the lighter cream to make sour cream and then put the rest of the cream through once more to give me some heavy cream for butter making. While creating this, I allowed the lighter cream that went through the separated to divide off into heavy cream and the rest into the milk from the first separation. From this semi-whole milk, I made my yogurt. So yogurt makers tell me, is my guess correct and less cream allows the culture to form a more cohesive product?
You really need the yogurt to be firm since when you add your sweetener and fruit, the yogurt becomes a bit slushy.
After I fuss with trying different levels of cream in the yogurt and testing for firmness and flavor, I want to try making different kinds of yogurt flavors like lemon which I think I'll make a custard like concoction to add to the yogurt to get a lemony flavor since just adding lemon juice would make the yogurt runny. Anyone come up with a variety of flavors of yogurts like the selection at the store?

The above photo is blackberry yogurt and of course just adding fruit and a sweetener is a simple, delightful addition. I'm also going to move beyond just yogurt to using it for ice cream. We decided that drinking JUST whole milk and cream, ice cream was a bit fattening. Not that we won't be having some of the fattening variety too but cutting calories wouldn't hurt us either. Some completely whole milk we will drink since it is higher in vitamin A than its lower fat cousin.
What I'm really excited about in making my own yogurt is that I can skip some more additives. My Yoplait favorites have modified corn starch, nonfat milk which is powdered milk that my book said all store yogurts add (it helps to thicken the yogurt), high fructose corn syrup (which I'll leave to my candies which I know aren't good for me), and the Yoplait label says citric acid, tricalcium phosphate, pectin, and add vitamin A ( that's because it's made with skim milk which is low in Vitamin A), and they throw in, acetate, and Vitamin D3. Commercial milk is also lacking in vitamin D's. So there you have it home-made yogurt gives you less which really means your getting more. Following that? You don't get what you really shouldn't have while getting more of what you really need.

Those of you who haven't made yogurt yet from your goat milk, heat up some milk to near boiling, cool it rapidly by placing the pan in a bowl of cold water decreasing the temperature to 115 F. Then use a yogurt culture. I bought mine from a cheese making supply. You can make yogurt from plain yogurt from the store. Keep in mind you are getting the additives too but for a first try attempt go for it. The pamphlet with the yogurt maker said don't use your yogurt from this batch that you started with store yogurt more than once to try and reculture another yogurt batch. Why? They didn't elaborate on but if your using a powdered culuture from a cheese making supply you can keep going and going.


Now I've got to make some granola. Kirk says what's missing from our home-made yogurt is granola. I use to make lots of that when the kids were little and I guess I'd better scrounge up that old recipe and get to work. He's dreaming of layering home-made yogurt and granola during his morning break at work. I can't argue with that choice of nurtitional snack.


Just in case your wondering why you should be eating yogurt especially home-made I'll let you in on a little tid bit of knowledge I learned from The Yogurt Book which is 117 pages long. Way too long to cover in this post.
Yogurt is digested in an hour while milk takes two or three hours to digest.
The process of making yogurt breaks down the vitamins in the milk to a more assimilable state, meaning your body absorbs more of the nutrients.
Yogurt also kills lots of bad bugs in your stomach like Salmonella typhi, and dysentery.
Yogurt is also a great way to treat diarrhea and in children it can prevent them from developing it.
I'll let you know how the whole milk yogurt turns out. I've made the buttermilk 7 times keeping the culture from the first batch going. The sour cream didn't turn out so well keeping it going but I've some more culuture and I'll get it master yet. Cream cheese making still lurks in my future but I figure I'd best get what I've got going down first.

Friday, November 26, 2010

Bleep

There will be a bleep in my postings or would it be more correct to say there has been a bleep in my postings. I have home-made yogurt to blog about. I'm so excited, I found out how to make it thick, a problem I had with goat milk before. And and... and...so many other things to share but the kids have been sick, there was Thanksgiving, and I just got word tonight that my mom fell and broke her hip. Not a minor thing when you have severe osteoporosis and are just about to turn 81. She will have surgery in the morning so I'll head out early for the five and a half hour trip over the mountain to the base of the next set of mountains. The ones that house Jelly Stone Park. Never heard of it. Well, some folks call it Yellowstone Park but for us who fondly remember Yogy Bear and Boo Boo, the cartoon characters, it will always be Jelly Stone. I'll think of you while I sit in the hospital room knitting away on my double thick mittens. I just might finish them, who knows. They are sure to help the nerves that always accompany such stressful situations.


I'll be back on Sunday night as the little ones will be waiting for Grandma to take care of them once more. Hopefully, I'll get a post off Monday. Beware, I just might resemble a yo yo for a while as I dash back and forth between caring for our small grand kids and my mother. Life is full of challenges at this midlife stage. Wish sometimes I had a lap top computer. Meanwhile, take care of yourselves and I'll be back soon.

Monday, November 22, 2010

Cold Weather Activities

Brrrrrrrrr...........
Everything is covered in frost.
The temperatures are hovering near zero and it is fore casted to go lower. What happened to our balmy fall weather? This is such a stark contrast.
It has put me in the mood for Thanksgiving and Christmas though I don't want to shop. I never want to shop except for groceries because I love to cook.
In the crock pot is some Goody Beans. The small crock pot was for us and the large one for the kindergarten's Thanksgiving feast on Monday. If you haven't had these beans, they are a must to try, just ask all the people yesterday that were raving about them.
So I'll give you the recipe so you too can receives rave reviews. We like them particuliarly with hamburgers. For some reason the Thanksgiving feast was to consist of baked beans. Maybe these weren't baked but close enough.
Sweet and Sour Beans
2 large cans pork and beans ( I use Bush's Original )
2 cans (15 oz) chunk pineapple with juice
2 15 oz cans kidney beans drained
1 pound bacon, cut up but not cooked (sometimes mine is cooked)
1 cup brown sugar
2 large green peppers, cut into chunks
2 large onions
4 Tablespoons Worcestershire sauce
Heat and let simmer to allow the flavors to meld together.
And while they are doing their thing in the crock pot pull up a chair and get those knitting needles a clicking. I'm almost done with the first double thick mitten and I have the second mitten nearly half done. What I ended up grabbing when I went to Idaho was two different weights of yarn and hopefully the lighter yarn will fit nicely inside the heavier weighted one.
Yes, the quilt I started quite some time ago is working its way to completion. I'm stitching in the ditch as they call it upon panels or strips. I'll tell you more about it later when I'm a bit further along. Since it has taken so long to complete it will end up being for our youngest grand daughter's birthday in January. Each grandchild receives a quilt to cover their grown up beds when they turn two.


Beyond this, I've several more projects in the works and I'm on my seventh batch of buttermilk. It and sour cream are doing their culturing thing as I speak.


I purchase a big container of Vodka last weekend to make a whole new series of extracts, lemon, vanilla, almond, mint etc. So while it snows outside and the temperatures plunge, I'll be where it is warm doing something new that I've always wanted to try and I'll be sure and share my adventures with you.

Friday, November 19, 2010

Blue Biscuit

Sometimes a toy comes along that no matter how many years go by it continues to be loved. Such is the plastic horse an older couple handed down to us. It had sat unloved since their oldest grand daughter, now grown, first loved it.

Oh the toy wasn't called Blue Biscuit back then and our grand daughters have no idea who Sea Biscuit is either. You remember him, the famous race horse of long ago. This plastic horse was named after a friend's pony for their kids. The word Blue added to differeniate the two plugs. This grand child could have sure used one of those horses we bounced on till the springs gave out when we were kids for she often crawls astride our old antique rocking chair's arm and tries to ride it at a full run into the sunset.
Too bad they quit making such wonderful toys like this one except in specialty catalogues for a fortune in cost. I can't help but think this horse does more for a child than 3/4 ths of the toys sold at Walmart. If you have any doubt look at this big smile.


Thursday, November 18, 2010

Part II Baking Powder Home-made

Today class I will teach you more than you ever wanted to know about baking powder and baking soda. I'm sure you are all a flutter in anticipation. No, well maybe we can stir up some excitement over the subject. I'm sure the rest of you have questions so let's answer the first one. Oh, no-one asked it? Well, I'll answer it anyway. What is the difference between baking soda and baking powder? Very good class, they are both leavening agent, kind of. Maybe I had best clarify that statement. Baking soda is a leavening agent if subjected to an acid such as buttermilk, citrus juice, yogurt, brown sugar (must be the molasses in it), ect. But baking sodas main job is to neutralizes the acids. Think of it as an anti-acid agent balancing the PH's. in the foods. Baking soda acts immediately when it comes into contact with the liquids in the batter forming carbon dioxide bubbles.


Hence, if the baking soda enhanced batter is left unbaked for too long, the bubbles pop and down tumbles the batter.


Baking soda has an indefinite shelf -life if store in an air tight container. They recommend if you leave it in a box that you use it within a year. The box has a expiration date on it. My plan is to use my Seal-a-Meal which removes all air after taking the product out of the cardboard carton which allows for absorption of moisture. To test baking soda to see if it is still good subject it to an acid. They recommend 1/4 teaspoon of baking soda in 2 teaspoons of vinegar. If it bubbles nicely, it's good.


What happens if you add too much baking soda to a recipe. You don't know? Wow, little Miss Flop here has learned that lesson more than once. Added baking soda instead of baking powder to muffins and yuck, the result was a soapy taste with an open coarse crumb.


Have I stirred up your curiosity about the subject of baking powder and baking soda? I hope so as we'll discuss baking powder next, which you learned yesterday has baking soda in it and one or more acid salts like cream of tarter and the corn starch is thrown in to keep them dry and non reactive until your ready. (Wow, long sentence.) The acid salts which in the home-made version is cream of tarter, reacts with the baking soda when they come into contact with liquid in the batter forming gas bubbles. These gas cells expand when placed in the oven.


Too much baking powder and your batter rises to high, the gas cells collapsing and the cake falls. It also leaves a bitter taste, and a course fragile crumb if you over do it. Too little and you have a tough, poor volume, with a compact result. When a recipe calls for baking powder and baking soda, the baking powder is doing most of the leavening and the baking soda is neutralizing the acids, plus adding some tenderness, and a little leavening.


To test baking powder to see if it is still good you add 1 teaspoon of baking powder to 1/2 cup of hot water. The mixture should bubble immediately. They say baking powder is good for 6 months to a year.


An added tip for you when you are baking with either of these products. Add them to the flour and stir so it becomes evenly distributed in your batter. Also, if you wish to add volume, creaming your ingredients before adding the flour with the leavening agent of choice. The creaming creates air pockets that are enlarged by the baking powder, baking soda, or both. Bake right away so that the air bubbles don't have time to collapses.


It's that last bit of advice that I have trouble with, the bake right away as it goes contrary to my energy levels and time constraints put on me by my grand daughters. You know my brain is going to be whirling on that avenue.


Just in case you haven't had enough I'll tell give you a short history. History isn't your thing? Well, skip on down to the next recipe for home-made baking powder.

*********************************************************************************************

When did baking powder first come into existence and why. It was the 1760's when they began playing with the ingredients but in 1843 Alfred Bird, a chemist, came up with a formula for baking powder because his wife was allergic to eggs and yeast. Until this time quick breads and the like needed yeast and we know that yeast takes from an hour to two hours to do its stuff. Since baking powder is 15 minutes or less, that is a decided time improvement on time.


Then in 1866 the Royal Baking Powder Company began manufacturing its version. You know them, they were the company that Anne of Green Gables wrote the romantic story and her best friend sent it in to the Royal Baking Powder Company contest and she was all embarrassed when she won.
Then Calumet Baking Powder Company in 1889 invested double action baking powder. That company I'm familiar with as it sits on our grocery shelves.

********************************************************************************************

Baking Powder

1/4 cup Baking Soda

1/2 cup cream of tarter

1/2 cup arrowroot starch (this does the job of corn starch)

Store in a air tight container.
This too is single action baking powder meaning most of the punch of leavening happens when it comes into contact with the liquids in the batter. There isn't suppose to be a second reaction to heat from the oven. Mmm... what will happen...?


Now you know all I know about baking powder and baking soda but the burning question is just how well does this single action baking powder work and what happens if I mix up my cream biscuits which has lots of baking powder in it and freeze the dough to bake layer? Just how flat will my quick breads or cookies be if they are left in the refrigerator for a while before baking?


Let the experiments begin!!! Join in with me and we'll share our results.

Wednesday, November 17, 2010

Home-made Baking Powder

Okay, I think I've researched it to death. Well, maybe not quite that bad but my curiosity is satisfied. The one question I haven't found the answer to is how well does it work. Oh excuse me, I'm thinking to myself and I forgot I was talking out loud. How well does home-made baking powder work in a variety of situations. For instance, can I use it in my frozen cream biscuits? The information I've read would lead me to say no but then have they tried it? I can't find anyone on the Internet that has given this home-made version a real serious trial. That is until now for I'm about to test it in a variety of situations. I know home-made baking powder probably came before the popular use of freezers and this women uses a freezer to the fullest. That's why I have three though one is my daughters but she isn't using it and I can't let one go empty.


I'm trying something new. Not that that is unusual but I had some Snicker Doodle cookies that were a little over cooked. We like ours really light in color and I over cooked some chocolate chip cookies too. Yes, that is my M.O. over cooking the last batch because my attention span is REALLY short. So I put the darker ones through the blender making a fine crumb. The Snicker Doodles I plan on using as the crust in a lemon or New York cheesecake recipe and the chocolate chip crumbs for the base in a chocolate cheesecake. I popped the crumbs in the freezer until I get around to making the cheese cakes. Some I hope with home-made cream cheese but that's another adventure not yet tried. With the crumbs I figure add a little butter and the they should work up nicely. "Waste not want not." the saying goes and though I've not perfected the saying, I have perfected the making enough mistakes to need to use it frequently.


Back to the subject of this post, home-made baking powder. I've heard the controversy about aluminium in baking powder and how it is bad for you, though it hasn't been proven to the FDA's satisfaction. I myself have had high levels of aluminum, lead, and cadmium in my body and had to undergo a couple different methods to remove the heavy metals which took a year to do so since taking it out also causes lead poisoning. Cadmium can destroy the kidneys and so it was done over a long miserable period of time. There I go again off the subject but the point of all this rambling is I'm avoiding aluminium since I have a tendency to collect it. My family did not test high in the metal and they obviously have lived with me a long time. Why me? Well, I'm low in Vitamin D and a few other essential things which helps to flush the offending metals. So where I can avoid aluminium, I do.


There I go again, anyway, I'm researching baking powder and going to give my home-made version a thorough test. The next few blog post will lead you on a journey of my research but you'll have to stay tuned for the results of the trial tests on baked goods as they will of course take some time.

  • Besides avoiding aluminium, which you can do by buying a non aluminum baking powder at the store, why avoid store baking powder? That was one of my questions. I found that the store also likes to add preservatives, not that that should surprise any of you. The baking powder in my cub board was from Argo and so I read the label. sodium acid pyrophosphate, sodium bicarbonate, corn starch and monocalcium phosphate.


    Great, what's that? So Internet here I came. The sodium acid pyrophosphate is a stabilizer, emulsifier (keeps from clumping), and chelating agent (preservative). If inhaled it can cause respiratory tract irritation; if ingested nausea, vomiting; and if it comes in contact with your skin, it can cause irritation. FDA says it is safe. Yeah, like I believe them on anything but I couldn't find anyone yelling about the product over the Internet so it's probably not real serious except that the average child ingests about 25 pounds a year of preservatives and you know that isn't good.


Next, I looked up monosodium phosphate which is a Ph regulator.


Corn starch is corn that has had the germ and bran removed, you know the good stuff that causes the corn to go bad earlier. Like in brown rice versus white rice.


Of course the sodium bicarbonate is the baking soda. Most of the baking soda we use is derived from trona which is mined right here in Wyoming - Green River, Wyoming.


Now that I knew what was in my baking powder, I researched what went into the home-made version. I told you this was a long drawn out process and you thought I was just going to give you a recipe. I will, I promise but just in case you are a label reader like me, or are just wondering why I'm bothering to make my own, a question I'm asking myself, then keep reading. I'll even tell you all about why baking soda is used verses baking powder etc. This brain never sleeps. My husband may disagree on that subject as I've been known to be space out once in a while.


Now, the home-made version is:
Baking Powder

2 Tablespoons cream of tarter

1 Tablespoon corn starch

1 Tablespoon baking soda

Mix thoroughly and store in an airtight container.


Don't ask me why I thought cream of tarter sounded menacing but I researched it and found it was the white powder found on the insides of barrels used in wine making. Who thinks of using these things? Anyway, it apparently is harmless. And you already know about baking soda and corn starch.


My daughter said to make my blogs short and sweet so tomorrow I'll tell you the shelf-life of the above ingredients, a different recipe for baking powder, and how baking powder and baking soda work in recipes. The biggy for tomorrow is explaining that this recipe is for single action baking powder versus the double action the stores sell. So stay tuned. I'm sure your on the edge of your seat in anticipation, or not if your thinking why I'm bothering over this subject at all. Just keep in mind I have an overly active mind and I'm always moving one more step towards self-sufficiency. With food recalls coming in at an alarming rate, who can blame me there.

Monday, November 15, 2010

Corn Bread from Sweet Corn

Finally, I made the corn bread. Things just don't seem to get done in the time table I want but eventually I do get around to it. Boy am I glad I did as it was especially yummy with the potato soup I made for lunch that included potatoes that are beginning to sprout eyes; and the Florida corn that was suppose to be eaten as corn on the cob but wasn't so I cut it off the cob and froze it; and the ham that was in ham and beans a week ago and was suppose to be used in twice baked potatoes but wasn't so I chopped it up and froze it also. Get the idea? Yup, especially with three little ones and a knife show to prepare for my plans kept changing.
Not that that doesn't happen frequently anyway.
But, one plan won't change and that is drying sweet corn next year for corn meal. Okay, Mother Nature could change my plans but let's hope she doesn't because the corn bread was a big hit with Kirk. I'm so excited to try saving my own seed; freezing corn for the long winter months; and drying corn and grinding it for corn meal. With it all from the same type of corn, it means I can accomplish all my corn needs within the boundaries of my garden. The garden that is large in comparison of most others in our county but not large enough to keep corn separated enough to prevent cross pollination of different types.
You may also be able to see from the picture that the corn bread has a less grainy texture. More cake like in fact and that isn't a bad thing. Gritty corn meal isn't my favorite thing. I also think that grinding the corn closer to the time period in which you make the bread has got to be saving vitamins inhancing our health.
Today, I made a half batch of corn bread that makes four large squares. Just right for two meals for Kirk and I. In case you don't have a corn bread recipe you love and you like yours really moist. This is a good one and remember you can half it to accommodate for just two people.
Corn bread
1/2 cup butter
2/3 cup sugar
Put butter in a sauce pan melting it and then add sugar, stirring until sugar dissolves. (I don't always wait until this has been completed before I add -- Okay, I never wait until this is completed before I add -)
1 cup buttermilk
Stir well and then beat in
1/2 teaspoon soda
1 egg
When beaten add the dry ingredients until blended and they are:
1 cup cornmeal
1 cup flour
1/2 teaspoon salt
Place in a greased 8 or 9 inch pan. Heat oven to 350 F. and bake for 30 minutes or until done.
If you want you can always add cooked sausage or chunks of ham to the batter to make a delicious breakfast treat. Plus if you get a hankering, throw in some sweet corn and you've a really corn treat.
Now that experiment is done, I got baking powder to make, extracts to get started on .... yada, yada, yada. Yup, my brain is a humming now ready for the next project.

Sunday, November 14, 2010

Longing For Home

It's the middle of the night and I'm sitting here at the motel's computer trying to breathe. Oh how I miss our unpolluted Wyoming air. If you had any doubt, NO!, I'm am not a good city girl. I dislike clothes shopping and if I thought my daughters would let me get away with it I'd buy five of the same style of shirt only in different colors and five pairs of Wrangler jeans and call my wardrobe complete as long as I had lots of sweatshirts and sweaters. But wait, that is what is sitting in my closet. The rest of the clothes seldom get worn but then I don't have very many clothes, period. In fact, my husband has more clothes than I do. Now how strange is that?


So while my chest heaves and each breathe becomes precious as my asthma flares up from city smog, one of my very few irritants that sets off my allergy induced asthma, know that this country girl is longing and dreaming of what she'll do when she gets back home. We'll leave early from the show today, in fact, I'm sure we'll leave very early and hit the road. This crowd isn't the type to buy Kirk's master level knives. That's okay, their just folks like us with pocket books that don't reach to the level of artistry that my dear hubbies skills have achieved.


I've done a little spinning while at the show and I'm going to start those double layered mittens today while we travel the long hours home. A real must is a conference with my hubby to create a Christmas shopping list. I can't believe how close the holidays are. I haven't a clue what I'm going to give as gifts. Usually I'm well on my way to ready by now but this year has really turned us on our heads.


But of course what I'll really be thinking about is the new experiments I want to try. That sweet corn I ground into corn meal is still sitting in the refrigerator and I found a new sourdough bread recipe in a magazine I picked up to read as my hubby drove here. It is a must to try. Two other recipes made their way into my kitchen aid mixer this past week and they were good but not quite what I'm looking for. They weren't much different than regular bread with sourdough starter added in. Now I've seen how those turn out I'm wanting the old artisan style back again. The ones that sit on the counter or refrigerator overnight and the flours have a chance to develop and impart flavor to the loaf. You know me, just one recipe is never enough and so I must journey beyond the one given to me years ago when I was gifted with a over hundred year old start that a miner had begun from the humble potatoe.


It was a simple white flour recipe and I'm wanting to delve deeply into rye, wheat, and other whole grain breads. Those heavy flours really change what you need to do to develop the lift in your breads. There is just so much to learn and try and so little time.

Morning just isn't coming fast enough, maybe I'll snuggle up and read a book for a while. Good night and know I'm thinking of you and longing for the simple life once more and of course some cuddle time with our precious grand daughters.

Friday, November 12, 2010

Sunday's Sunrise

You can't help but stand in awe with a sky like this. My only disappointment was the trouble I was having in finding a focal point for my photographs. No rabbit volunteered, no antelope, not even the sagebrush were high enough to sillouette against the sky.
So I opted for the fence around the water tower. Kirk said it looked WWII ish but one has to do what one has to do.


Have a great weekend. One in hopefully I get at least one double mitten knitted.

Thursday, November 11, 2010

Bringing a little history to our grand daughter's classes.

It was off to the public school to teach the kids about woolly mammoths and walruses. The kindergartners first welcomed us on Monday and we stretched our measuring tape out to lay kids down along it to find out how many kindergartners it took to reach the shoulder of a woolly mammoth. And as we weighed kids to see how many it took to equal the 400 pound mound of dung left after a mammoth had eaten for 16 - 18 hours to satisfy it's appetite for one day, we also showed pieces of various mammoth tusks, a partial mammoth molar and walrus tusks too.

The kids loved it as they learned facts and we delighted in working with such an enthusiastic audience. Hands on learning is by far the best.
Our grand daughter's pre-school class joined us on Wednesday and we shared a much shorter version as many of the concepts we shared with the kindergartners wouldn't have been understood by them. Some of my other free moments, like I have very many of those, I spent photographing knives to get ready for an upcoming knife show.
I've still one knife to photograph but it isn't quite done but this puukko knife has me fascinated. The style of knife is from up north, way up north in Finland and Scandinavia and I can imagine a reindeer herder carrying one at his side so I photographed it on reindeer moss. The original style of Puukko is more simple and of course Kirk not being a copy cat added his own artistical style changing the bolster and butt of the knife just a little. The handle is woolly mammoth ivory.

Wednesday, November 10, 2010

Mittens and a New Thumb Design


Yes, the storm hit and though we didn't get very much snow yesterday, this morning it is snowing hard and we may yet get another inch making it a total of 2 1/2 to 3 inches of snow. Hardly a storm worth calling the National Guard out for but the transformation in our grand daughters from a year ago is astounding.


Until now, they have been coddled. They've lived in a house that was so warm they ran around in their underwear most of the time and the car was always heated up before they were put inside. Needless to say, they didn't adventure out into the weather much. But this grandma has other ideas. We keep our house in the middle 60's to upper 60's and wear sweatshirts all the time. At that temperature the cold and flu germs stay closer to the ground and don't breed so rapidly. That helps to keep the germs aways from our mouths and noses and the experts say lowers the chance of infection along with our heating bill. They also say your brain operates more efficiently and I could sure use that help.


We also heat with wood and coal that is put inside a free standing stove in the basement ,so the heat level fluctuates throughout the day. We have insulated curtains to close at night and you can really fill the difference when you open them in the morning to let in the light. The temperature in the whole house drops.


The change in lifestyles has changed the way our grand daughters view the weather outside. When it snowed, the first thing they did after school was beg to go out in it. They climbed into the snow pants I bought for them last year but they never wore and out they went rolling and playing in the cold white stuff. A far cry from the whining whimpering children of a year ago that couldn't stand it if their feet or hands got the least bit cold.

We don't have snow boots yet, though I did look a bit for some when I was in town last time but their rubber chore boots did fine for the short time they were out. Their hoods in their coats had to suffice until I can get some hats knitted up. So with new coats, where we are really hurting is mittens. I've one nice commercial pair of double layered ones for our oldest left over from when our kids were small but they are a bit large for her. The other two children were without. Last night, I stayed up to finish a pair for our middle grand daughter. A pair that I had changed the thumb configuration on. The idea came from a thin thin pair of grey mittens that our daughter bought to go with our youngest's mouse costume. The way the thumb lay out flat to the side made it so easy to get our littlest's thumb slipped into that it sparked my creative juices. Those of you with little ones know about slipping on a pair of mittens and then maneuvering a small child's thumb into the separate opening slot. Not fun. With this style there isn't any of that bother. Their thumb goes where their thumb belongs automatically.

Note the position of the thumb on the left and the traditional mitten on the right. The other thing that I don't like is that when you are making especially small mittens, the thumb opening isn't very big making handling three to four double pointed knitting needles with only a few stitches on each a pain.


The right mitten is for our youngest and the left, our middle grand daughter.


Lest you think I undertook quite a designing feat, think again. I'm not that smart. I just casted on eleven more stitches evenly around the needles after the ribbing. Then when it came to the thumb, I separated eleven stitches off onto a stitch holder and stitched around to those stitches again but then added two stitches at the end before attatching them to the stitches on the next needle. When I picked up the thumb stitches to knit them separately I picked up three stitches with a crochet hook filling in the opening that the two stitches from the main hand area left and proceeded to knit the thumb. Now hopefully for you knitters that was clearer than mud.
For an adult, I wouldn't put a thumb in in this manner but for small children, it is a real time saver when dressing them. The little bit of this color and that colored Merino wool yarn is left over from a hat I made. It is some wool I bought some years back and spun into yarn on my Ashford wheel.


Next, I'm going to try making up a pattern for double thick mittens. Ones with a mitten inside of a mitten but attached at the tip of the thumb and also at the tips of the fingers. I've had the idea in mind for years but no little hands needing mittens. I use to just let the grand kid's parents buy their things as I saw the snow pants I purchased a couple different times go unused. They never used the sled we purchased for them or anything else for cold weather we bought until now. The grandkids have big plans that include snowmen, snow angels, and sledding and that is just as it should be.


It brings back memories of snow turkeys and bears and our son with a home-made bow and arrow made from twigs off the willow tree out shooting his snow creations. Oh how our kids loved to play in the snow. I'll show you one of these days a pair of mittens I found from when our children were little. With all the time they spent in the snow, I had to have a bag that trailed around with me where ever I went just in case I had a few minutes to knit. Our kids frequently came inside covered in snow to exchange their wet mittens for dry ones making it necessary to lots of old towels to mop up after them and multiple sets of mittens for each child. And they wore them out at a rapid rate. I can see those days have returned and I'd better get to knitting fast and furiously.


Though I feel the results of staying up late last night, I did rather enjoy watching old reruns of M.A.S.H. with a cup of warm raspberry cranberry juice laced with cinnamon and cloves and my knitting in my lap. Now I'll start on those double layer mittens I've had in mind for years.

Monday, November 8, 2010

Sunrise and Alfredo Sauce

We may not have much for trees but the wide open prairie doesn't obscure nature's fireworks. And the last couple of mornings I've been out in my pajamas for all the neighborhood to see shooting photographs of the awe inspiring skies as the sun creeps over the horizon.
It has helped sooth this troubled soul. My Autism and Addison's disease have raised their ugly heads and panic attacks have reined supreme but with steady doses of knitting, photographing and the like, I've managed to temper the edge off and I may yet survive this coming week. LOL. ?
Tomorrow, I hope to show you what I've done to an old mitten pattern by changing the way I do the thumb. Winter weather is to come in with a roar this evening and the skies tomorrow are to be filled with snow flakes. Those mittens I've been knitting are sure to be needed. I've almost got two pairs done.
But for now, I'm going to report on the Alfredo sauce I froze in ice cube trays and small containers.
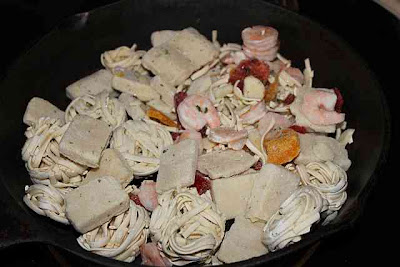
This is a package of commercial Bertolli's. I found it quite bland but the concepts of the frozen cooked noodles, the frozen vegetables, and sliced cubes of Alfredo sauce sent me into one of my "Anything they can do, I can do better." moods. You will recall I told you about making the sauce and freezing it. This time I cooked it up. Well, part of it anyway.
Lest you think it was all home-made, it wasn't. I admit, I didn't make the noodles but used store Pennes because the grand kids don't like my home-made noodle versions and I had some left over from a meal I had made for them. Another time I'll use my own home-made. The vegetables were a package of frozen stir fry kind from the store that happened to be on sale for a great price and since this was a do it in a hurry meal and I didn't have a pre-mixed package of my own from my garden and wasn't willing to dig through my full freezer for a little bit of this and a little bit of that from a number of different vegetable bags of my own it did nicely. Wow, that was a lo...ng sentece.
Sunday night was one of those Autism is screaming nearly out of control and my body is giving out moments. I figured survival was more important than sticking to all home-made.
But, note to myself --- Next year mix up some of my own mixtures of vegetables for just this kind of dish.
Along with the vegetables, noodles, and frozen Alfredo sauce, I tossed in some left over turkey YUMMY!!
Kirk did say, that next time I needed to put in more Alfredo sauce. So a note to you is put way more in than you think you need.
All the foods are put in the fry pan together and it can't get more simpler than that.
Tomorrow, I'll show you Sunday's firey sky but right now we are off to the school to teach kindergartners about Mammoths and Walrus of long ago.

Friday, November 5, 2010

Souffle Frozen

Yum, yum, this morning we had coffee cake with pineapple on the bottom, a bowl of canned pears, and souffle. Lest you think I was up super early this morning to create such a feast, think again. Yes, I did make the cake this morning but the souffle came out of the freezer.


You heard me correctly, the freezer. That is what the picture is of, raw, frozen souffle. I made my favorite recipe from good old Betty Crocker. The cookbook I received as a wedding present. The one that is missing the back cover now. Then I froze the raw creation. Of course it was a cheese souffle. This time with pieces of ham chopped small and broccoli. My favorite is finely chopped zucchini, not cooked, and ham. Most of the time I freeze a number of small containers that can go from the freezer to the oven. I wonder if this would work as well if you used a large dish? The middle may not thaw fast enough.


It is a great idea for a lazy Saturday morning brunch or when you have company coming to stay. I do know that you do not thaw the souffle before baking. That is one mistake I haven't tried. I'm in too much of a hurry to eat it. I heat my oven to 350F as usual and bake.

Wednesday, November 3, 2010

Projects in the Works

Oh, how the calendar is full and I'm craving some sleep. Sleep, that isn't interrupted by menopause that awakes me at 3 or 4 in the morning wide awake, yet exhausted. Sleep, that isn't filled with the pitter patter of little feet drumming into my back and sides. If our youngest grandchild were a pancake, she'd never get done for all the flipping sides she does. Let me rephrase that for she does sleep soundly at times but only if she's on top of me weighing down upon my chest. And oh how she moans in her sleep. By the later part of the week, my prayers are filled with pleas for just one nights un-interruption slumber where I can awake not aching all over and dark bags under my eyes that don't make me look like something the cat drug in. Though actually since I have Addison's disease, my eyes don't go puffy, they look like they'll disappear into a large sink hole instead.


Lest you think our youngest never sleeps by herself, she does. Just not for two to three nights after having spent the weekend with her father or for that matter a night with her mother. That blissful night or two where she occupies her OWN bed, right before she's gone again is heaven, that is if one of the other girls doesn't come creeping in to crowd me nearly out of my bed and elbow or jar me with a knee. Sometimes like last night, we share the luck as grandpa and I had bed partners.
Nothing like doing without to make something more dear and precious. So the reason you haven't heard from me for a few days isn't because I'm not doing anything. It's because exhaustion has left me working on automatic mode, barely getting things done. That doesn't mean that I haven't done anything new. It's what keeps me sane. I just haven't had the energy to write about it. But lest you think I'd forgotten you, I thought I'd best make contact today.
I made a new kind of sourdough bread yesterday. One that uses yeast also. I've come to the conclusion if I want to get to the point where I'm making all my own bread again, I need some recipes that are quick and some that raise over night. Sourdough bread recipes are especially appealing after I read they are isolating the bacteria that makes sourdough and have found it has cancer fighting properties. Second, on my priority is low yeast breads. They are better for you and during the depression, even yeast was hard to afford. Yes, more challenging times are sure to come for this nation and I'm taking lessons from The Great Depression Era.


All the rage are the mix up a big batch of dough and leave it in the refrigerator pinching off a bit now and then to use, but it won't do for me. My refrigerator is full of jars of milk, cream, sour cream, buttermilk, etc. Not to mention the two jars of sourdough culture and food. That's not counting the normal things in a refrigerator like lettuce, tomatoes, oranges, apples etc. And I haven't even begun to start making my own mayonnaise yet. One project I'm sure to do sometime soon.
And while I'm talking about starting things, I've all the research done and the materials to do my own baking powder. I know lots of you are doing it. Let me know what you think. Does it matter whether you mix up double action or single action? And do you like it as well as the store kind?


This weekend, I plan on doing thermophilic and mesophillic cultures. I've been lazy before and I've used the instant kind for cheeses but it's long past time I moved on from there. My next dairy experiment will be cream cheese and a mesophillic culture is needed. I did learn that you can use the left over milk substance after making butter to create buttermilk and I might try it but I'm so thrilled with my present results, it isn't likely.
Today, I'm culturing some more sour cream from the batch I made a while ago and I've done buttermilk three times now from the original start. Oh how I've grown to love my buttermilk. My next move is to get out the ice cube trays again. Instead of the Alfredo sauce they once held, I'm going to freeze starts of sour cream, buttermilk, and after this weekend, mesophylic and thermophilic cultures. Yep, milk products is my main focus this year and how better to utilize my goat's milk,not just feed the cats, chickens, pigs, and calves with the excess though the garden has seen its share lately. Ever since I learned milk is a wonderful fertilizer that boosts calcium levels and causes a population explosion of the micro-organisms in the soil, I've often put my separated milk into the garden. I've come to think one just can't live without a dairy goat, especially one as sweet as Chicory. And if I'm going to have a milk separator, I need to utilize it to the fullest. They aren't a cheap piece of equipment.
I do need to use more of my butter for baking and everyday use. So many goals, so little sleep to energize my body to get them done.
Last night I moved forward on one of my experiments. I was going to have corn bread with the ham and beans but I ran out of steam, energy wise, and we had the new kind of sourdough bread instead. I found it interesting that I was heating corn to go with hamburgers for the kids (small children aren't fond of soup)
and just before that I had taken the same kind of corn, sweet corn, and ground it into flour.
I know if you have a stone grinder that you are suppose to grind a little corn and wheat to clean the stone but my old grinder of thirty years is a Magic Mill and I've ground popcorn but never sweet corn or field corn. Yes, I did say popcorn. I knew a lady that used it in breads. You might be able to use it in cornmeal. I don't know why not. As for the question about how did I dry my corn to keep it from molding. Well, I just shucked mine after it had gone fairly dry on the stalks. Then I laid it on newspaper in the basement. The instructions I read said to pull the husks back and hang it in a dry place. I didn't have a place to hang it. As for mold. Most of the time there isn't much of a problem. All of Wyoming is dry most of the year. Our humidity yesterday was 14%. Oh we do get some humidity now and then but nothing like those of you down south. That makes me a poor resource to ask how to dry corn. Right now I'm wishing for some moisture as I'm having to water trees and raspberries etc. because it has been so long since we've had moisture.


So in conclusion. Tonight, if the beef doesn't get out like he did last night while the bread was baking and the kids were in the tub and I can find an ounce or two of energy, corn bread will accompany our pork chops for supper tonight. Then I'll report back to you on how well it turned out. Meanwhile, I'll try and sneak in a minute or two to finish the mittens for our youngest grand daughter. The ones I put two thumb holes in last weekend. Yep, I was real tired then too as our oldest daughter and I worked on updating her resume.