Thursday, December 29, 2011

Using Every Scrap

Whew, I made it in the nick of time for Christmas. The last sewing project for Christmas was the grand daughter's dresses, and I finished them Christmas Eve.

BUT, for me, the push isn't over as we've four birthdays within the the first eight days of January to get ready for. With a budget stretched beyond comfortable due to unforeseen bills, such as a major repair needed on the pickup truck, I've turned to skills to fill in for the lack of money.

How terribly grateful I've been this holiday season for the talents I've developed.

We had just such a conversation at church just before Christmas. It was between some ladies from my generation and a little older and a few young gals. The question was posed, "What do you do when Christmas is coming and you haven't the money for gifts." Luckily, it was hypothetical. The younger generation admitted they would have to rely on the generosity of others for their gifts came from the store. 

 We assured them that that wasn't necessary if one had just a bit of imagination and a few skills. With a few dollars or a resourceful gathering of free items, a variety of gifts could be made if one had taken the time to develop a some basic skills. Skills considered unnecessary in this day and age when you can just run to the store and pluck it off a shelf.


I started the conversation rolling with a comment about how unnecessary all these charities at Christmas would be if only one took the time to learn to take care of oneself.

Those of the older generation piped in with things they'd made when their budgets had been tight. We spoke of taking a wool sweater and unraveling it for the yarn to them make a smaller sweater, mittens, a hat, or a scarf or of felting it to make pot holders, a purse, or mittens. Others spoke of items made from second hand clothing. My mind wandered off into woodworking, jewelry making, and many other areas of creativity. 


 The Toys For Tots programs and other charity organizations would all but shut down because recycling, and creativity would take its place with people providing for themselves and only the truly needy would be left in need of service. 

 Maybe instead of Toys For Tots programs, we need build it yourself centers where people could come and learn a skill while creating a gift. It would be akin to the feed a boy a fish and you've fed him a meal but teach him to fish and you've fed him for a lifetime kind of thing.  
 
 It was with this mindset that I took my sewing skills I gained making almost all our children's clothing from their underwear on out and began making Christmas presents. I took some factory bolt ends, (material left over from the bolt at the factory, sold at discounted prices) and sewed the little girl's dresses. Not all the fabric was my favorite but the price was half that of the other selections on the bolts surrounding it.

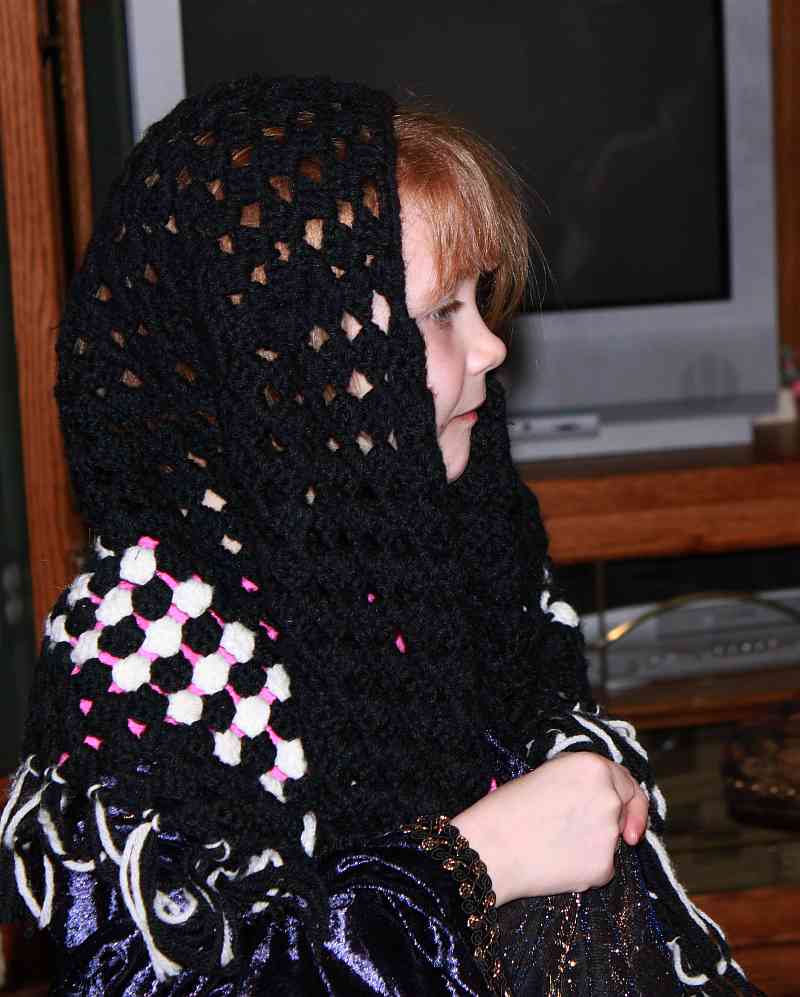
 With birthdays nipping at my heals to get ready for, I haven't stopped there. To add to the clothing item gift for our oldest grand daughter that was badly needed but not terribly exciting, I made this small, lined project bag from a small scrap left over from our youngest granddaughter's dress. The dress that sprung up from a jumper pattern that I added sleeves to along with a few other design alterations so I didn't have to spend money on a new pattern.

This project bag for our oldest will hold the crochet hook and yarn her Aunt gave her for part of her birthday present. She was pretty excited about that present that she opened early for it promises many hours of enjoyment in the future.  

It is time we teach our oldest grand daughter to crochet so that she can create gifts for herself and others just as I taught her mother and Aunt years ago. The hope is to inspire our grand daughter to create gifts for herself and her siblings.

Who knows maybe she will be like her Aunt Toni and take this love of crochet and turned it into a career. Our oldest daughter is editor of Crochet Me, an online crochet community for Interweave Press.  Our oldest daughter's skills in crochet and knitting now far outreach mine, not that that was too hard. I am thrilled that she is now the teacher and I'm the student.
 But I'm not stopping with the project bag. I'm incorporating the "Waste not, want not." theory and taking the yet smaller scraps of fabric from our youngest grand daughter's dress and ....
adding some more scraps of fabric from other projects, years past, to make a baby doll blanket. The fabrics maybe don't match quite  adequately for a dress but they will work for a doll quilt. Add some scraps of white fabric sewn into doll diapers and our youngest grand child will be thrilled.

The best part is this Grandmother won't feel guilty that she hasn't gotten her three-year-old nap quilt done. I haven't even started it.  You see when each of our grandchildren reaches two I make them a twin size quilt for their bed and at three years of age, they are presented with a nap quilt I've made. The top of that quilt will also be made from scraps of fabric left over from past sewing projects.

With a little know how, gift giving need not bankrupt you, and who doesn't want something crafted with love and the most precious gift of all—time.

What home-made gifts did you create for Christmas? I'm always looking for new ideas. 

Tuesday, December 27, 2011

Food Traditions

When I was small, and we know that was a long time ago, my Great Grandmother, for Christmas, would make us popcorn balls and gingersnap cookies, mailing them from Idaho to our Wyoming home.
I still make popcorn balls for Christmas using her recip. Well, kind of.
You know I can't leave a recipe alone and this one is no different. I add a little more corn syrup and flavorings such as grape, cherry, orange, or cinnamon oil instead of vanilla.  
When we were growing up, my mom would wrap this gooey goodness around a Tootsie Pop (sucker), that much I haven't changed. We use to give this treat as a gift to our friends and neighbors and sometimes I do the same. This year, I made this treat with our two oldest grand daughters, passing the tradition on to another generation.

The best thing about this recipe is the popcorn balls stay gooey and soft.

I'll give you my recipe though you'll have to guess how much popcorn to pop because I've never measure that. It's quite a heaping bit though.

3/4 cup corn syrup
1/2 cup butter
1 cup sugar
3/4 teaspoon flavoring of your choice.
a pinch of salt
 

Add a few drops of food coloring dye if desired.

Place corn syrup, butter, and sugar in a pot, bring to a boil while stirring. When the mixture is at a rolling boil despite your stirring and the sugar is dissolved, turn off the heat and add the pinch of salt along with the flavoring. This is when you can add a few drops of food dye.

Stir and then cover, leaving it for four minutes before pouring over popped popcorn that you've sorted all the Old Maids out of. You know, the kernels that didn't pop. Stir to coat the popcorn and butter your hands so the goo doesn't stick to them. Begin forming balls in the same manner as you would make snow balls intened for your onery brother, pressing hard to get them to stick together. Add plastic wrap to each individual ball and some pretty ribbon and it's festive enough for any holiday.

My neighbor, after receiving this recipe, made them each Halloween for Trick or Treaters she knew. These were of course orange flavored and dyed orange.
To read about another tradition, hop on over to our daughters blog at Crochet Me.

Monday, December 26, 2011

Tradtition dicatates that the story of Jesus's birth is told by Kirk on Christmas Eve. The story, though centuries old, gains a new twist each year as family takes hold of it and adds their own flavor. 

Maybe I should explain.
Our youngest grand daughter was getting a bit cranky by evening, having spent a no nap couple of days at her father's house.
She wanted no part in our Nativity story but everyone else dived into the costume containers and chose a role.
We had Joseph in our middle daughter's old fairy godmother's robe from the play Cinderella, along with a beard I'd made for the play Hillibilly Wedding.
Our oldest grand daughter became Mary in a sparkling dress and an old shawl of her Great, Great Grandmother's.
We aren't too wise so we could only come up with one Wise Man–our step-grandson.

With just two little sheep to watch over, our oldest daughter dressed in Noah's wife, Sarah's dress from another school play.
We had the cutest donkey too, complete with tail and ears played by our middle grand daughter.
Our middle daughter donned several different wigs in her dual roles as King Herod and the Inn Keeper.
 And all would of gone well despite laughing so hard the actors and actresses could barely play their roles but the youngest grand daughter refused to allow any one of her three dolls to play the part of baby Jesus. In the end, she decided that she would He, baby Jesus.

And she comfortably settled into the part despite the confines on the cardboard box.
We are off to see the Grandparents today and our oldest son who had to work on Christmas, but before we go, I wanted to share a little of our Christmas with you. I hope that your weekend was as memorable and delightful as ours.

Friday, December 23, 2011

From Our House to Yours

I want to have a long conversation BUT, I'm sti...ll sewing. It wouldn't be so bad if I didn't keep changing the patterns, and the pressure of so much to do for Christmas is wearing me down.
 I'd like to go and take a long winter's nap.
 I can't quit yawning.

Have a Merry Christmas. Next week we'll have a long talk.

Wednesday, December 21, 2011

Home-made Sweet Potato Fries


Having a really tough day. My muscles are wanting to cramp up something fierce. Just love this water / salt imbalance, NOT. It's a part of my Addison's and I have medicine for it but I didn't take it for one day and now.... I'm not getting a thing done. So much sewing to do and here I lay.  

I do have a tid bit for you though. I made sweet potato fries, froze them, and finally last night I baked them. You know how I love make ahead freezer foods and sweet potato fries are pricey to buy frozen but a yummy treat so I looked up the how toos and did my own.

You should think about trying it too for the store boughten, frozen sweet potato fries are three times or better what you can make them at home for. Not sure what else is on the label of those store fries but you can bet it is more than just sweet potatoes. Factories can't leave any wholesome food wholesome.

What I did was buy sweet potatoes when they were 89 cents a pound and then cut them up into fry size, baked them in the oven at 350 and froze them when cool. 

Later I took them out, should have sprayed them with a little oil, note that I said should have because I usually do and these did need it. Then I baked them at 400 Farenheight in the oven as they sat on a cookie cooling rack perched on a cookie sheet. The cooling rack is so the air will circulate all the way around the fries. That way they don't get soggy on bottom. The spray just makes them less dry.

I think next time I'll go for 450 to even maybe broiling temperature for a crispier fry.

So when you see those sweet potatoes reach a good price at the store, bring a bag home and make your own fries ready to pop in the oven for a crispy re-heat.

Tuesday, December 20, 2011

Yup, They're Awesome

 Look at those tall sides. No hangy overs, no overly crisp outsides and doughy insides.
Yup, these pans from King Aurthers for whole grain breads are awesome. They are built to be passed down to generations to come and though they are heavy, I'm in love.

Now that I've given you my opinion of how well these pans work, that I promised when I bought them, I've got to go and get to sewing. I've three little dresses to complete this week and I'm only half done on the first one. Oh Christmas can't you wait just a little longer, Grandmas not ready?

Friday, December 16, 2011

A Unexpected Visitor Down My Chimney

No, it wasn't Saint Nick that came down my chimney. This visitor was quite a bit smaller and technically it wasn't a chimney that he came down but a stove pipe. None the less,  I couldn't have been more surprised if it had been Santa Claus.

I don't know when my visitor arrived but it wasn't until I was upstairs stamping the snowmen on these paper lunch sacks that I heard this tap tap tapping. Not like a hammer and not the rattle the refrigerator makes. I was baffled but with no time to spare since our daughter and grand daughter were soon to arrive to fill the sacks with goodies for the first grade class's Christmas party, I didn't stop to investigate thinking the muffled sound had to be outside at the neighbors.

But after the sacks were ready for the popcorn, pretzels, nuts, and chocolate kisses, I headed down stairs to start a wood fire in the stove to warm our tile and hardwood floors.  

This is what flew out when I opened the stove door, yup, a woodpecker. He was tapping on the glass door of the stove.

I jumped back in surprise and then laughed until I began to wonder just how I was going to get him out of my basement. I trooped upstairs and left him to fly around as I set up the hot air popcorn popper and got out the popcorn. Two ( our daughter and I) would be better than one to try and catch this unexpected visitor and I wanted our little two year old grand daughter to see what came knocking on Grandma's door.

We both put on gloves, our coats, in case he scratched or pecked us, and we started to corner him. He of course took off in flight and I reached up and snatched him in mid-flight. Boy, was I surprised but not as surprised as our daughter who let out a squeal and then slapped her hand over her mouth. Yes, she knows better than to make such noises having been raised around livestock but she is our girly girl.

There was no way I thought I'd nab this bird this easily but I guess the skills I've gained chasing and catching chickens that get out of the chicken coop is good for birds of a different feather too. 

We let him loose and he flew off clear to the other side of town and beyond out of sight. I bet he didn't stop until he reached the trees way over yonder on the bison ranch.

Thursday, December 15, 2011

Butternut or Delicata?

I grew Delicata squash last summer. It's the squash on the left of the Butternut squash. I wasn't impressed with it.

Some, on the Internet, said Delicata tasted like sweet potatoes, so I tried them since sweet potatoes are pretty hard to grow here and I love them. Having tried Delicata, I definitely wouldn't describe them in that manner. They were pretty bland in flavor but then again remember that I don't like spaghetti squash for its texture and lack of flavor so the fact that I wasn't thrilled with the taste, wasn't a surprise. The part about tasting like sweet potatoes was a mystery since my taste buds didn't pick up anything like that.

 
Another disappointment was the size. To give you an idea I cooked Delicata's  next to a Butternut squash that came in my Bountiful Basket (food cooperative group). Yeah, pretty puny and the yield of squash per plant was not impressive either. Maybe it just didn't like our area. 
 
The few squash that I received didn't have a large amount of pulp either. The insides were pretty hollow and full of seeds. One squash was not much food for the two of us. Just one meals worth. Then again I like a good sized helping, squash being one of my favorite things.
The amount of pulp looked pretty bad especially in comparison to the Butternut squash, The deeper color of the Butternut also held a richer more robust flavor. 

Butternut squash is not a variety I've grown. I'd have to say that I still prefer the buttercup squash for taste. The Hubbard coming in second so it isn't likely I'll grow any Butternut.

That's what this experimenting is all about, finding the best crops for our area and those with the most pleasing flavor for our family.   

Yet, there are those you like Delicata squash. Just hit the Internet to find them. So, if you are one of those people who wants a small serving of a mild tasting squash, Delicata just might be for you. I'm sticking to Hubbard and Buttercup. Unless of course you have a suggestion for a short season winter squash with loads of flavor and high yielding. Then I just might give it a try.

Wednesday, December 14, 2011

Hole..eee Bread or Not?

Yes, I've been experimenting a little with bread. I chose white unbleached flour as this was for a church party and the woman would shy away from a hearty whole grain loaf.

I'm not complaining because it gave me an opportunity to experiment with grain texture. White flour being the least fussy to work with.
First of all, I made my artisan bread that had only 1/4 teaspoon of yeast, 1 1/2 teaspoon of salt, 1 tablespoon of sugar, 3 cups of flour, and 1 5/8 cup of water. You stir this all together and let it sit over night or until it doubles. You stir again and let rise and I (not according to the instructions) stir again and let rise once more, stir again and place in a well floured cotton kitchen towel and let rise.

I particularly like the low amount of yeast and sugar used in this bread. No oils either so it's low calorie, easy on the stomach.

A great deal of stirring and rising but in this method the yeast feeds off a different section of the dough which develops flavor. Time instead of sugar are what is needed for the yeast to multiply and raise the bread. To hurry this process along, American breads add far more sugar for the yeast to feed upon instead of the flour itself. This of course means that the flavor of the flour is not fully developed.


If you want your bread to reach its full height you not only allow it enough time to rise in the pan but you also raise the temperature in the oven for a while. As with the artisan bread I just made which is cooked in a preheated dutch oven that I grease when its hot and have heated to 400. Then I put the lid on a bake. This gives you a holey, chewy European type bread with very little effort. Yummy!!Some say bake at 450. Bread is one of those things you have to do until you figure out what works best for your elevation and oven.

Though American style breads often say to bake at 350, I've found a higher temperature is helpful. I raise mine to 400 to allow the bread to spring to its full height and then drop it down to 375 after the dough just starts to turn in color. This prevents the over browning of American style breads but allows them to reach an added height.  One sight I watched preheats their oven to 400 and then drops it down when they put the loaves in but I figure the oven temperature naturally drops because you opened the door so I prefer to wait.

With my bread sticks I made for the Italian meal, I tried mixing American style and European. Using my new found, and may I add infant, knowledge about the science of bread I decided to play. I added my yeast, but dropped the amount by a teaspoon which was about a Tablespoon total, and poured over the yeast 2 cups of water letting it set to proof (means raise to make sure the yeast is good). Then I added a fourth cup of sugar to add flavor and increase tenderness. Plus, half to three-quarters of the flour allowing the bread mixer to run for five minutes or so. This develops the gluten in the flour.

The dough will be very sticky and just barely want to follow the dough hook around. Be sure and use high protein bread flours as they have a higher protein and gluten content and will give you a higher raise. I then let the mixture rise until doubled.

This is when I added the salt because salt enhances flavor, tightens the gluten structure, and controls the yeast growth.  I of course use REAL salt which is natural and minus the eleven chemicals used in store salt.

Be sure and add salt for you don't want your bread to taste like beer from an out of control yeast growth, well maybe some of you do. Also keep in mind that too much yeast will retard gluten development. It is this yeastier taste in American breads that I dislike most.The raw dough gives me a belly ache unlike European breads. 

I put in about 1 1/2 teaspoons of REAL salt which is minus all the chemicals and has a stronger flavor. Don't add too much salt though as it retards yeast growth too.

This is where I added a drizzle of olive oil as fats coat proteins and cause a softer crumb and gives you a longer shelf life of your bread. But, added too soon will also inhibit gluten development. This is why in professional breads high in fats, such as butter, it is added later after the gluten has already developed. 

I then added the rest of the flour, which means until the dough chased the hook around and let the mixer run again for five minutes or so to further develop the gluten.  The bread raised again and then I rolled it out into bread sticks, placing them on a greased cookie sheet to raise a final time. 
This is not your fast American, one hour bread but a more flavorful lighter crumbed version. Note the slightly larger crumb texture from the typical American bread and the slightly larger holes. These bread sticks were touted as phenomenal by the ladies at the church Italian dinner. Next time I might add an egg which lends a golden color to the bread, adds nutrients, and helps aid gluten development.


I can't wait to start playing with whole grains. 

Monday, December 12, 2011

Blueberry Snickerdoodles

My daughter and I saw where someone used fresh blueberries in snickerdoodle cookies. Well, I wanted to try them but I also wanted to see what happened if I used dried blueberries instead of fresh. I figured dried blueberries would be similar to using raisins in cookies. WRONG!!

I'll tell you what happened. Since I was making four different kinds of cookies and making an extra meal for a friend and her family, I just whipped up all four kinds of cookies and put them into plastic containers on to our handy dandy extra frige. You know, the garage steps. They work great this time of year when it is chilly.

I didn't get around to cooking the cookies until after supper and oooops, all was well except in the case of the blueberry snickerdoodles.

The dried blueberries altered the flavor quite a bit and it was yummy but the problem came in with the fact the dried blueberries absorbed a fair amount of the fluid in the cookie dough. I didn't take into factor that raisins are more moist and dried blueberries are much drier. 

So letting them sit meant they had lots of time to absorb moisture from the cookie dough forcing me to add a little liquid before baking. They still came out drier than I'd like. The shape wasn't as attractive either.

But I haven't given up. Next time, I'll just be sure and bake right after mixing.

Don't let my mishap deter you because the taste is really good and  if you are looking for something a bit different to bake this holiday season, try blueberry snickerdoodles.   And if you use fresh blueberries, be sure and tell me how they turn out.

Friday, December 9, 2011

To Grow or Not to Grow

A dish of root vegetables at a dinner party last Sunday left me wondering, should I grow turnips and parsnips in my garden next summer. Some of you may be shocked but I've never grown them. I've hardly ever eaten them. It just wasn't a vegetable served at our home growing up and it isn't something you see very much in the grocery stores around here.  
It wasn't that I noticed that I loved the baked vegetable dish or anything but I wondered whether nutritionally where they stood because I liked them okay. About the same thing you could say about broccoli. But I do like broccoli in things better than eaten by itself. But I mainly eat it because it's good for me. Not super good since I have a thyroid condition and that means I should limit my intake of this particular vegetable. The same being true if you were on the medication Coumadin but for different reasons.


So since my middle name is curious, not seriously just characteristically, I just couldn't get those vegetables off my mind. Here it is a half a week later and I just couldn't stand it. I had to go and buy one turnip and one parsnip and make a stew, tasting each one raw first. Of the two, I liked the turnip best. But after reading how sweet the parsnips are suppose to be, I'm left wondering about the farmer. Mine was okay tasting but I definitely wouldn't call it sweet. Maybe he forgot to leave it in the ground for three to four weeks of cold weather like the instructions say in order to change the starches to sugars.

Who knows but according to the nutrition chart,  parsnips have a higher glycemic level than almost any other vegetable. Two times the carbs of carrots, a close relative. If you are low on carrots you can substitute parsnips for them in a recipe but then you'd be missing that pretty orange color and carotene. My research revealed that you can also eat them raw in salads.

As for growing them, I remember as a kid my neighbors grew them but then they grow nice cantaloupe too over in that country. The down side to growing them is the seeds don't last. You have to order new ones every year because they won't germinate if stored longer. That dampers my interest in growing parsnips right there.

When I went to nutritondatas.self.com on the Internet, they had these lovely nutrition charts on everything. I could of spent hours there but I'm feeling guilty about my blogs this very hectic week and so I figured I'd better get a move on getting this one done.

I did switch back and forth comparing parsnips and turnips nutritionally. Parsnips were quite a bit more nutritious but they do have a mild inflammatory rating along with a higher omega 6 to omega 3 levels and then there is that dratted glycemic level.

Where the turnips shown was in their greens. Yes, you can eat the tops and the roots like with beets. The greens were high in vitamin K and A. K being good for osteoporosis which is highly hereditary in both sides of my family. Kale and spinach is even higher in vitamin K so I'll just eat those instead.

Ths is the nutrition site. http://nutritiondata.self.com/facts/vegetables-and-vegetable-products/2514/2#ixzz1g4HcVgwM

Yet when all was said and done, I just couldn't justify growing these two vegetables in my limited garden space. For several reasons, the fact that I like them but don't love the taste and nutritionally they aren't a must grow for health.
If you are a turnip and parsnip lover, good for you. I probably just don't know what I'm missing but I think I'll just stick to my present vegetables for now.

Wednesday, December 7, 2011

A Quick Gift

My mom loves these things. She attaches them to the stove and uses them to dry her hand on. I'm not fond of them but our middle daughter wants some too. So if you are looking for a inexpensive home-made gift. Think of whipping up a few. They are a dish towel cut it in half and then a cloth top. I used an extra large button because of my mom's poor eye sight.

Friday, December 2, 2011

Apple Pumpkin Bread

When  I made the two different kinds of pumpkin pies to test the New England Sugar Pie and the Rouge Vif Detampe pumpkins. Well, I still has some more pulp and so I made Apple / Pumpkin quick bread. No, those are not nuts but apple chunks that you see.
 
I used my new quick bread pan that I got from King Aurther's when I bought the whole grain bread loaf pans.  This pan is especially for quick bread as it is narrow and long. The same principle applies as with the dense whole grain bread pans.

Narrow so the heat can penetrate more quickly all the way through. The only choice in this style of pan was glass, so I went with it.

Despite the narrow, long design, I still had to bake the bread for quite some time since it had two cups of chopped apples and a cup of pumpkin making it really dense so I bake it at 325 Fahrenheit and had to check it a few times to see if it was done by sticking a knife into the center. This bread becomes dark because of the apples, pumpkin, and the hefty amount of aromatic spices included. 

In actuality, this bread was a muffin recipe but I've found over the years you can interchange muffin and quick bread recipes putting them either into muffin tins or quick bread pans.


Yup, you make this recipes by putting the dry ingredients in one bowl, wet in the other, and chopped apples in a third container. Mix the wet into the dry and fold in the apples.

Put it into the pan and bake. What comes out is nice playing card size slices just right for serving. After it baked, I sliced off a third of the loaf to save for Kirk and I to eat and froze the rest for later.

Kirk and I only ended up eating one slice a piece of the unfrozen quick bread. I forgot to take into account how often the grand kids come over. It did make a wonderful after school snack but had I thought, I should have know the grand kids would be over and could eat the whole thing.

I did discover that the bread was much better eaten after two days where it had time for the flavors to meld. It made the bread taste better and more moist.

For the recipe go to allrecipes.com and look for the Apple Pumpkin Muffins submitted by Taste of Home's Fast family Favorites

Thursday, December 1, 2011

Arsenic in Your Juice and Rice

Our daughter sent me this link and I'd highly recommend you tke a look. http://health.yahoo.net/articles/nutrition/arsenic-in-juice?page=3
I've copied a few statements from the article to wet your appetite and give you some idea what it says.

I caution you that the government does not control the arsenic levels in our food and a long time ago arsenic was a part of the pesticides used by farmers. It never left the soil except to piggy back in some of the foods we eat. For brands they test that were high in inorganic arsenic, read the article. Yes, there is inorganic and organic. The inorganic being the nastier one.

So read away. You'll be shocked. I was.
********************************************************


10 of three dozen apple-juice samples with total arsenic levels exceeding 10 parts per billion (ppb).


“People sometimes say, ‘If arsenic exposure is so bad, why don’t you see more people sick or dying from it?’ But the many diseases likely to be increased by exposure even at relatively low levels are so common already that its effects are overlooked simply because no one has looked carefully for the connection,” says Joshua Hamilton, Ph.D., a toxicologist specializing in arsenic research and the chief academic and scientific officer at the Marine Biological Laboratory in Woods Hole, Mass.


In addition to juice, foods including chicken, rice, and even baby food have been found to contain arsenic—sometimes at higher levels than the amounts found in juice.
Rice frequently contains high levels of inorganic arsenic because it is among plants that are unusually efficient at taking up arsenic from the soil and incorporating it in the grains people eat. Moreover, much of the rice produced in the U.S. is grown in Arkansas, Louisiana, Mississippi, Missouri, and Texas, on land formerly used to grow cotton, where arsenical pesticides were used for decades.


U.S. rice has among the highest average inorganic arsenic levels in the world—almost three times higher than levels in Basmati rice imported from low-arsenic areas of Nepal, India, and Pakistan. Rice from Egypt has the lowest levels of all.


Infant rice cereal for the U.S. market is generally made from U.S. rice, Meharg says, but labeling usually doesn’t specify country of origin.

******************************************************
Just one more reason to try and produce all we can of our own food.

Wednesday, November 30, 2011

Bread Pans for Whole Grain Breads

With my goal to start creating whole grain bread on a level yet to be seen in this household, I knew I needed different bread pans to achieve this elevated level.

How did I know? Well, I'm no stranger to making bread, even whole grain bread but I wanted to start incorporating much more than whole wheat. I wanted to use a variety of grains, seeds, nuts, a few vegetables, and even beans.

Yes, you read it right, beans. Some of the recipes I'm about to try call for them soaked, cooked and then used in bread. Some for beans just ground through your wheat grinder into flour and used with other flours. And even some told how to sprout beans and grains , then dry them before grinding into flour. This sprouting method being the ultimate nutrient booster.

And I don't want to stop my experimenting there I want to use some of those vegetables I dried and turned into powder. Wouldn't they be wonderful in boosting the nutrient levels in my breads, along with adding flavor?

While my brain was galloping off into these varied paths, it couldn't help but side track to crackers also.
But first before I got serious about bread making, I knew I needed new bread pans. New bread pans because the tiny pans on the left in the picture were too small to form a serious loaf of sandwich bread.

The 8 1/2 x 4 1/2 inch pan in the middle was too wide and though I get a decent loaf of white bread out of them, wheat bread has to be cooked until the outside is quite dark to get the inside done. It's a long ways for the heat to reach the center because the pan is so... wide.

This meant I just couldn't stand it and with fear of my bread becoming dry and over cooked, I'd frequently snatched them out to discover the centers doughy. Waste not, want not, entered and the ends became slices of bread while I disasembled the rest skirting around the doughy center to cut pieces for dressing, bread crumbs, and crouton making.

These wider pans also mean that the heavier, heartier breads with whole grains with the added weight, flop out on top, leaving wings.
Of course there are those whole grain breads that can hold their own form creating lovely round and oblong shapes (Sorry, all I had was a picture of artisan white bread)
But, some grains like Khorasan wheat which is buttery and rich - can not hold a round or oblong shape and needs some confining.
And though the round or oblong breads are great, sometimes a loaf shape is what's needed. So off to my chef supply catalogues I went along with a search of the Internet for information on bread pans.

I saw chit chat on how wonderful different finishes are and dark surfaces versus shiny. Even glass versus metal. But since I have one glass bread pan similiar in size to the metal ones and it still didn't bake the whole grains the way I wanted, I knew there had to be more to it.

Finally, I found a great video on bread making with whole grains. It didn't give any recipes but it did give techniques for  using rye or whole wheat. It mentioned that you needed a narrow bread pan for whole grain breads to allow them to bake through more easily. It also spoke of the importance of measuring your dough, two pounds per loaf. I would guess this is so the bread gets done inside and all the loaves at the same time. That is if your oven is working right.

I was so... excited to see this because finally, someone was speaking my language. So with this bit of information off I went to look at the three chef supply catalogues I have. Only one fit the need, King Aurther's.  

They had bread pans in 8 1/2 x 4 1/2 inches, 9x5, and 9x4x4. Only the 9x4x4 fit the bill for what I needed since Khorasan wheat was highly nutritious but can NOT stand up on its own. Hence, the high sides which support the dough keeping it from forming wings and the narrow bottom which allows the insides to get done before the outside is dark, dark brown. 

 The pans also have ridges along the sides and in, touted to help air circulation. The pans weigh a ton. Okay, maybe not that much. But, they are hefty. Yet, with this thick construction, I know they will conduct heat well, similiar to a cast iron pan. I have a couple of those bread pans but they are also wide. I am going to bring them in and give them a work out too, to see where they fit in, in my bread making.  No, the heaviness the of King Aurther's bread pans isn't bothering me since I'd guess they will last through my lifetime and my children's too.

The price is pretty hefty for these. No, Walmart special. So if you are looking for just such a pan be prepared to pay $17.99 but keep in mind this is an long term investment. I've learned that if you buy good cookware, you only have to buy it once. 

I'll tell you soon how well I like them.